Milo - Enter The Simulation
[BY]
Banula Perera
[Category]
Tips & Tricks
[DATE]
Apr 10, 2025

All Milo Commercials consist of 3 things. The action packed life of a school kid. A killer music track. And a sequence of chocolaty goodness that you wish you could taste through the screen.
This is how we created that sequence.
Malt beverages such as Milo, usually show the individual key flavours coming together to make the final beverage we all know and love. This type of sequence of this magnitude was a new challenge for us, and accounted for a lot more trial and error than we anticipated.
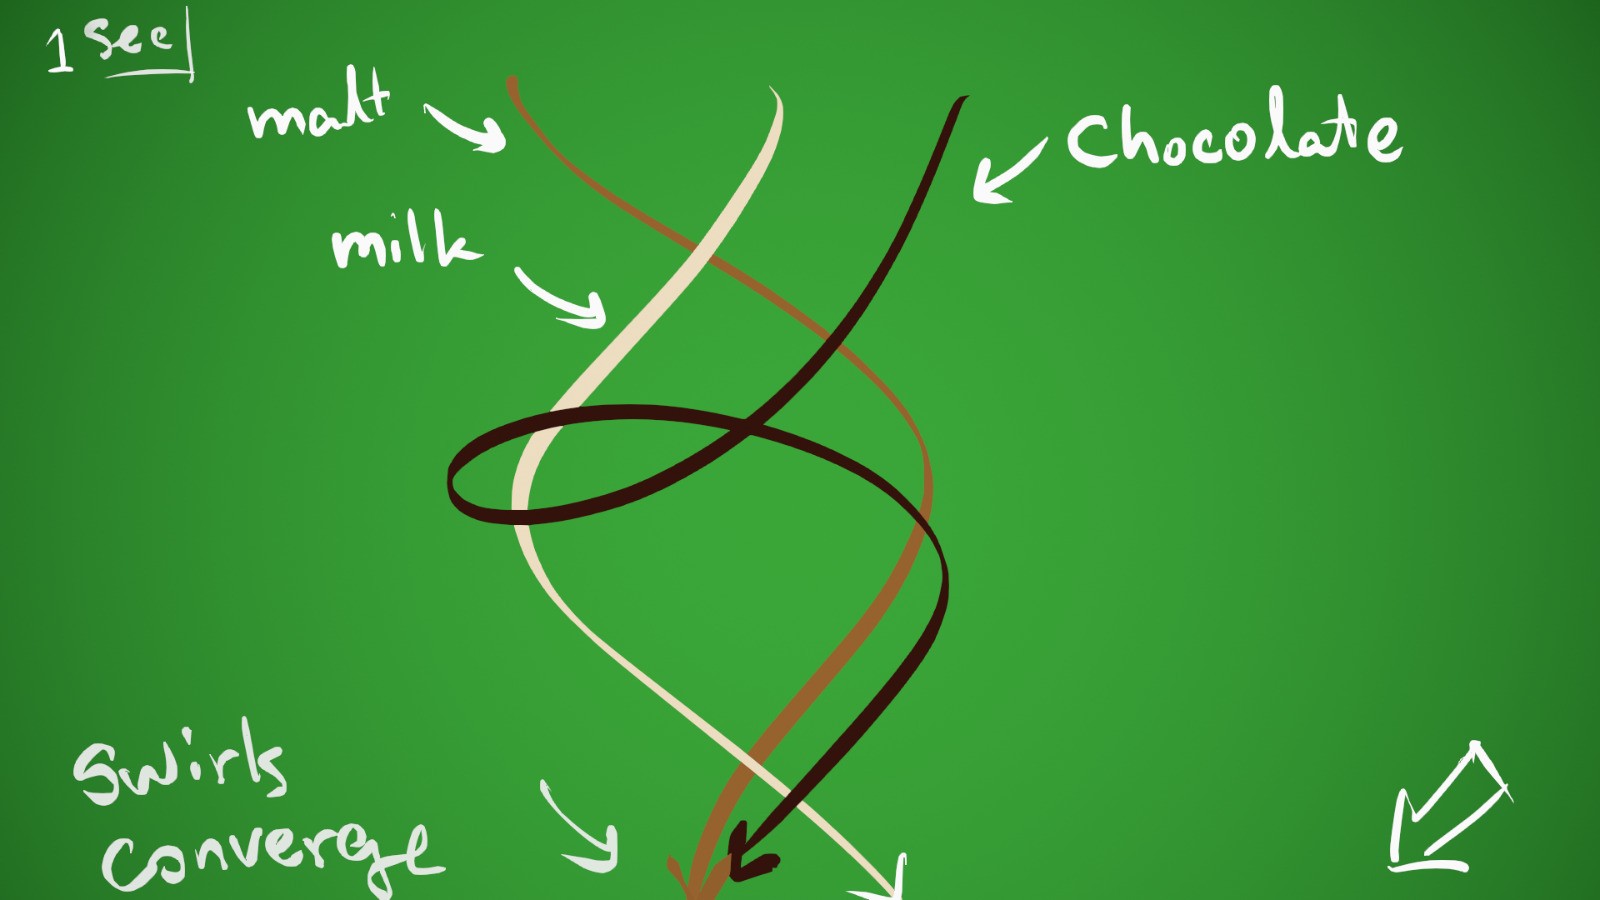
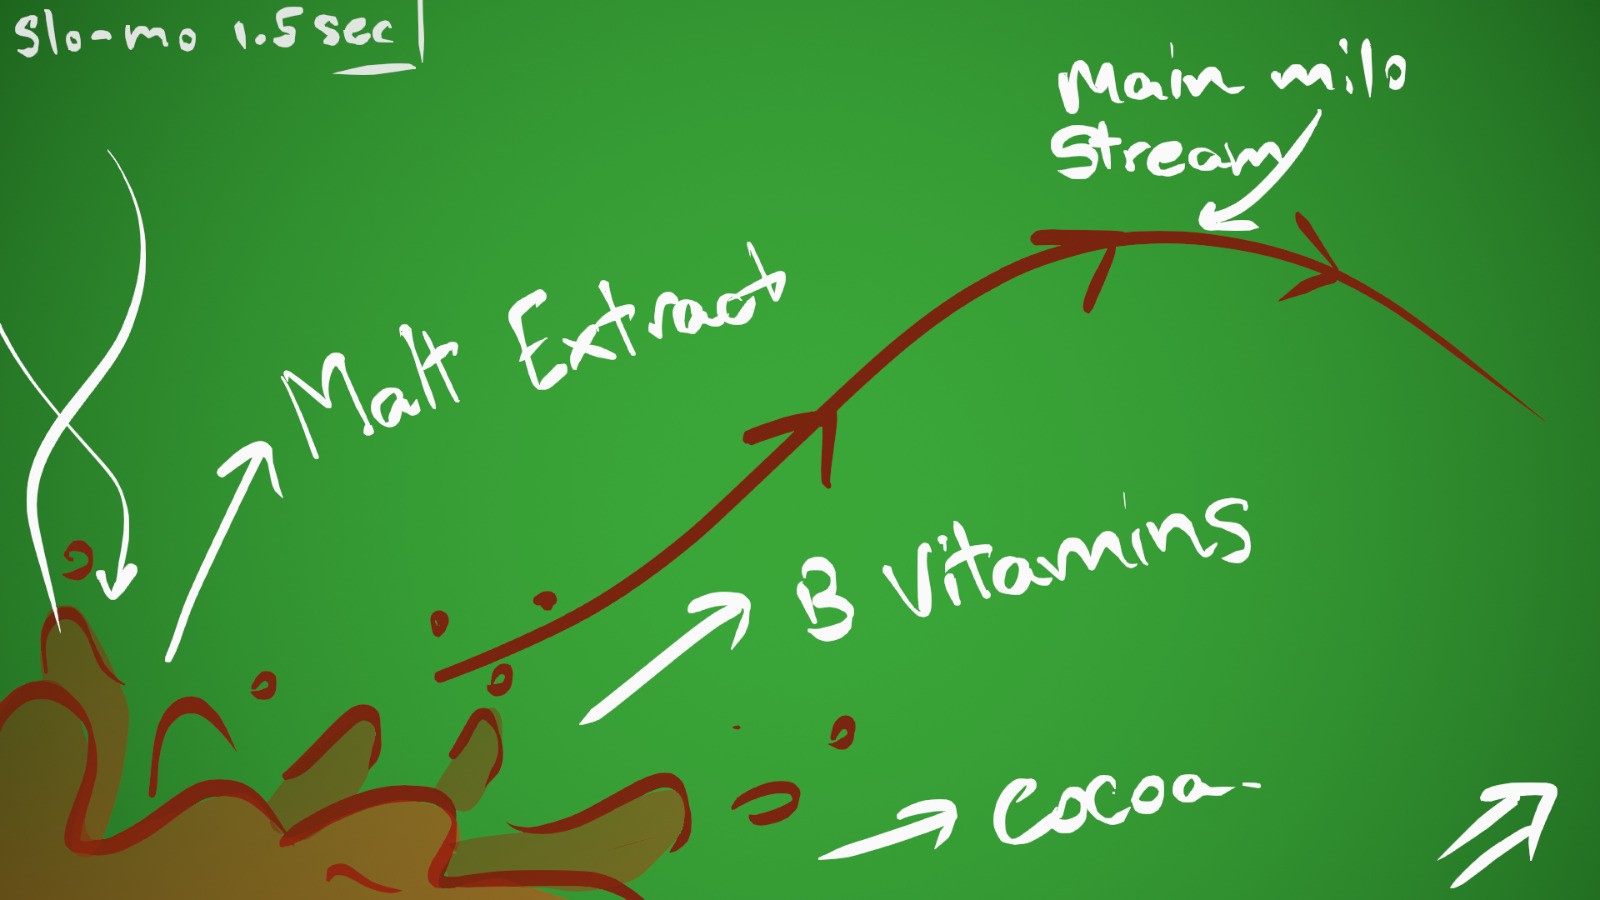
The product window shows 3 liquid streams of malt extract, milk, and chocolate spiralling together into one big splash that forms the new 125ml Milo pack.
Upon the start of this project, high-quality liquid simulations remained elusive, as all the attempts that I’ve made in the past using Blender’s fluid simulator resulted in meshes that came with unusable levels of jitter. Blender’s fluid simulation tools were frustratingly cryptic to navigate and the process more or less revolved around tweaking sliders with technical parameters, and waiting 20-30 minutes only for an unusable simulation to come out the other end.
So the initial approach to this project was simply to avoid simulations altogether (as much as possible).
Mesh Curves and Animated "Simulations"
The initial idea was to have three streams of malt extract, milk, and chocolate descend from the top of the screen and spiral into a big splash of milo. This way, the streams that would require more precise movements can be created with pre-modelled liquid meshes and the big splash could be created with a simulation, hence, best of both worlds.
The Initial Storyboard
The initial meshes were hastily modelled and projected onto a curve that the stream was to follow, and the liquid meshes were displaced on top so that the liquid would have secondary 'blobular' movements, to try and mimic liquid.
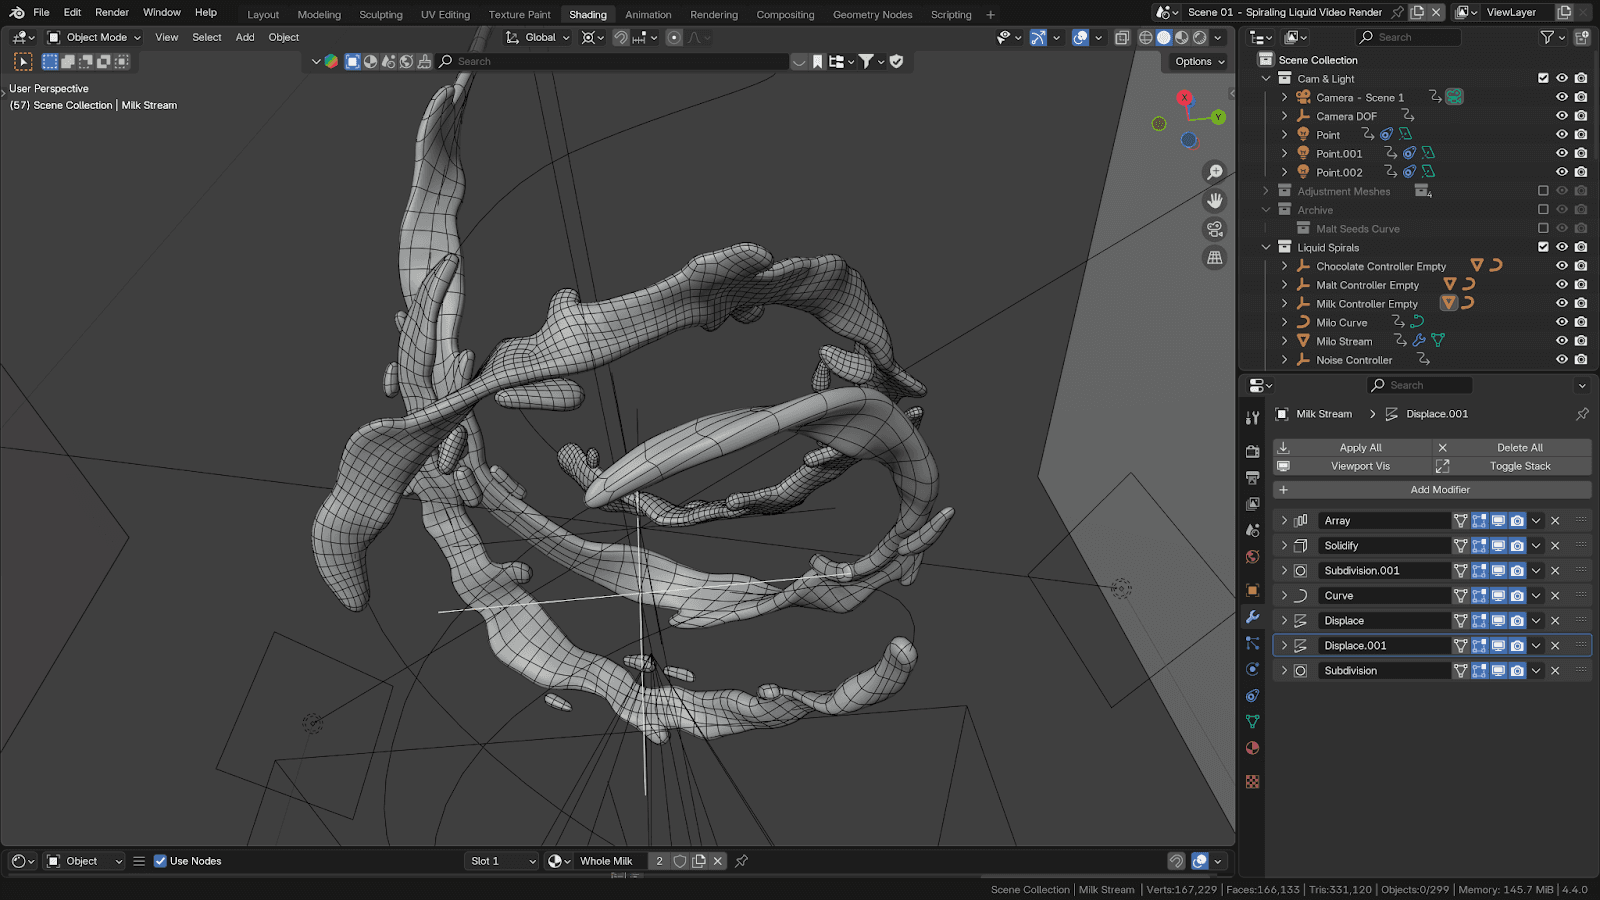
The First Mesh Iteration
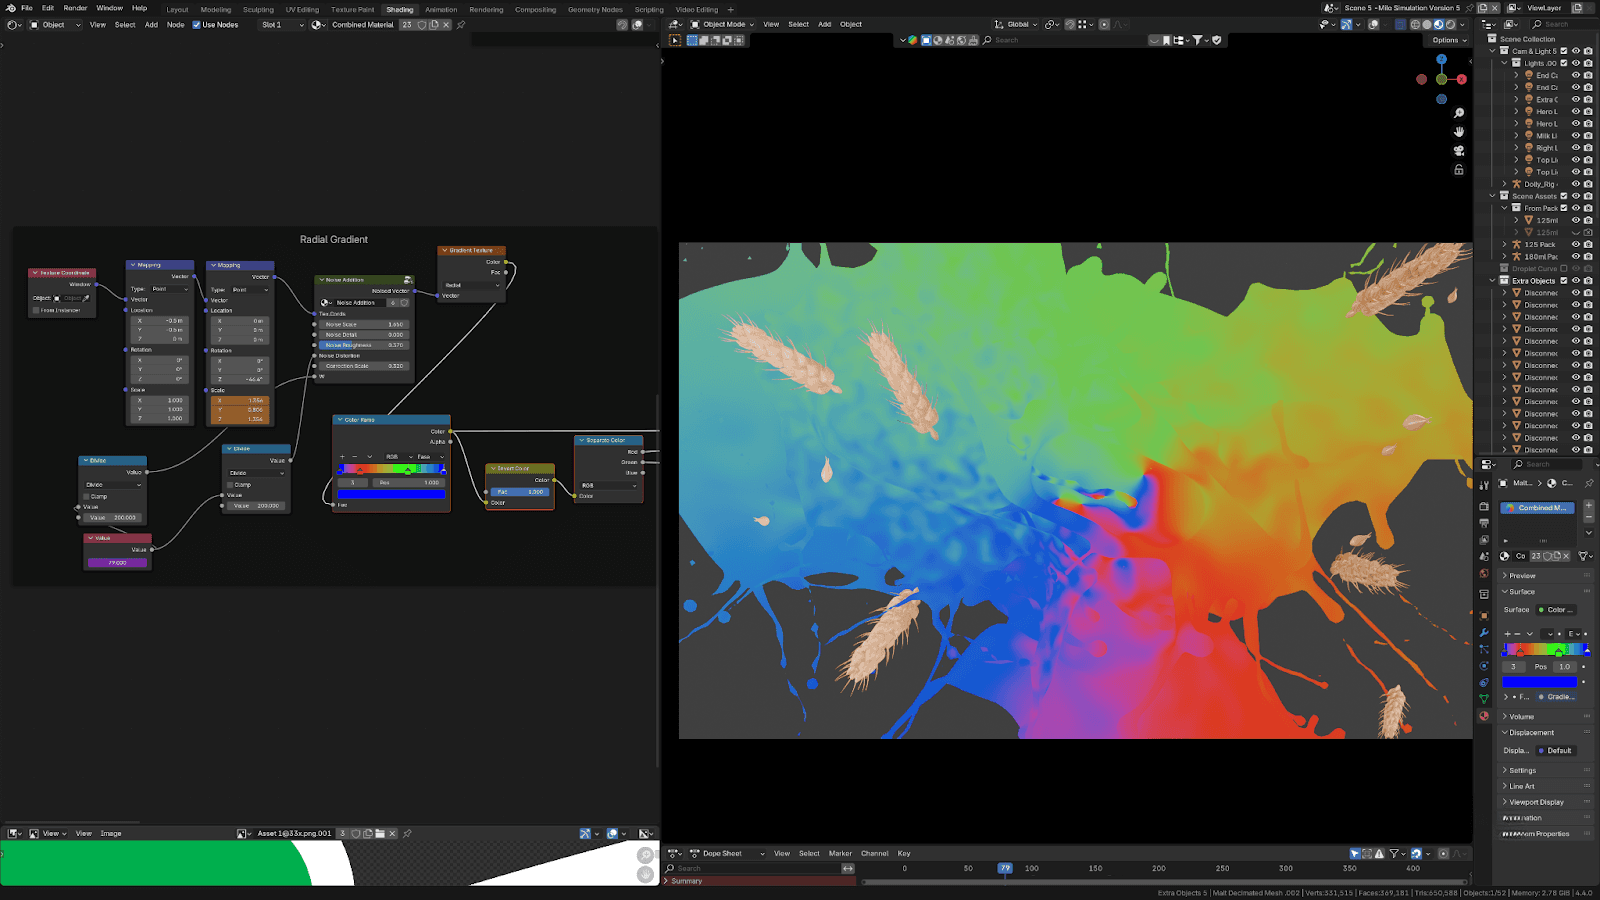
The grain stems were created using a little thing called Geometry Nodes. If you're a fairly intermediate Blender user, you may know what i'm talking about. For those that don't, its a much simpler way of creating complex assets such as these, without modelling the entire thing from scratch for hours on end. So essentially what I've done here is create one grain, and then using geometry nodes, repeated that single model across a stem, in a way that makes it look like an actual modelled grain. This is an extremely flexible workflow, especially if the client has requests to change the length of the grain, or some minute detail.
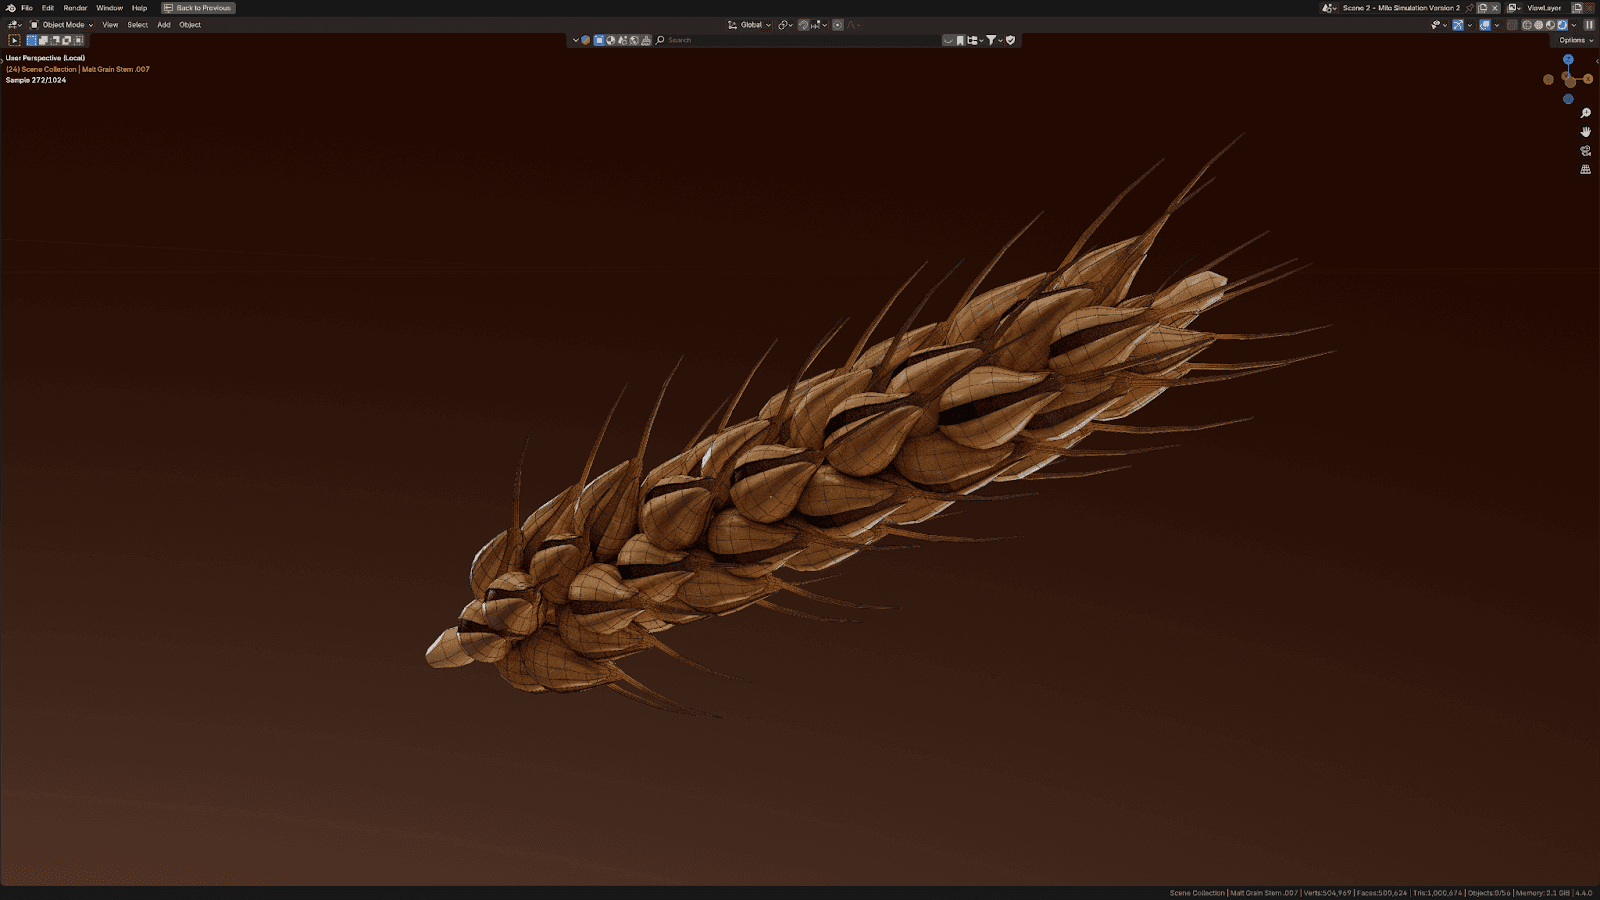

The Grain Stem Geometry Nodes Setup
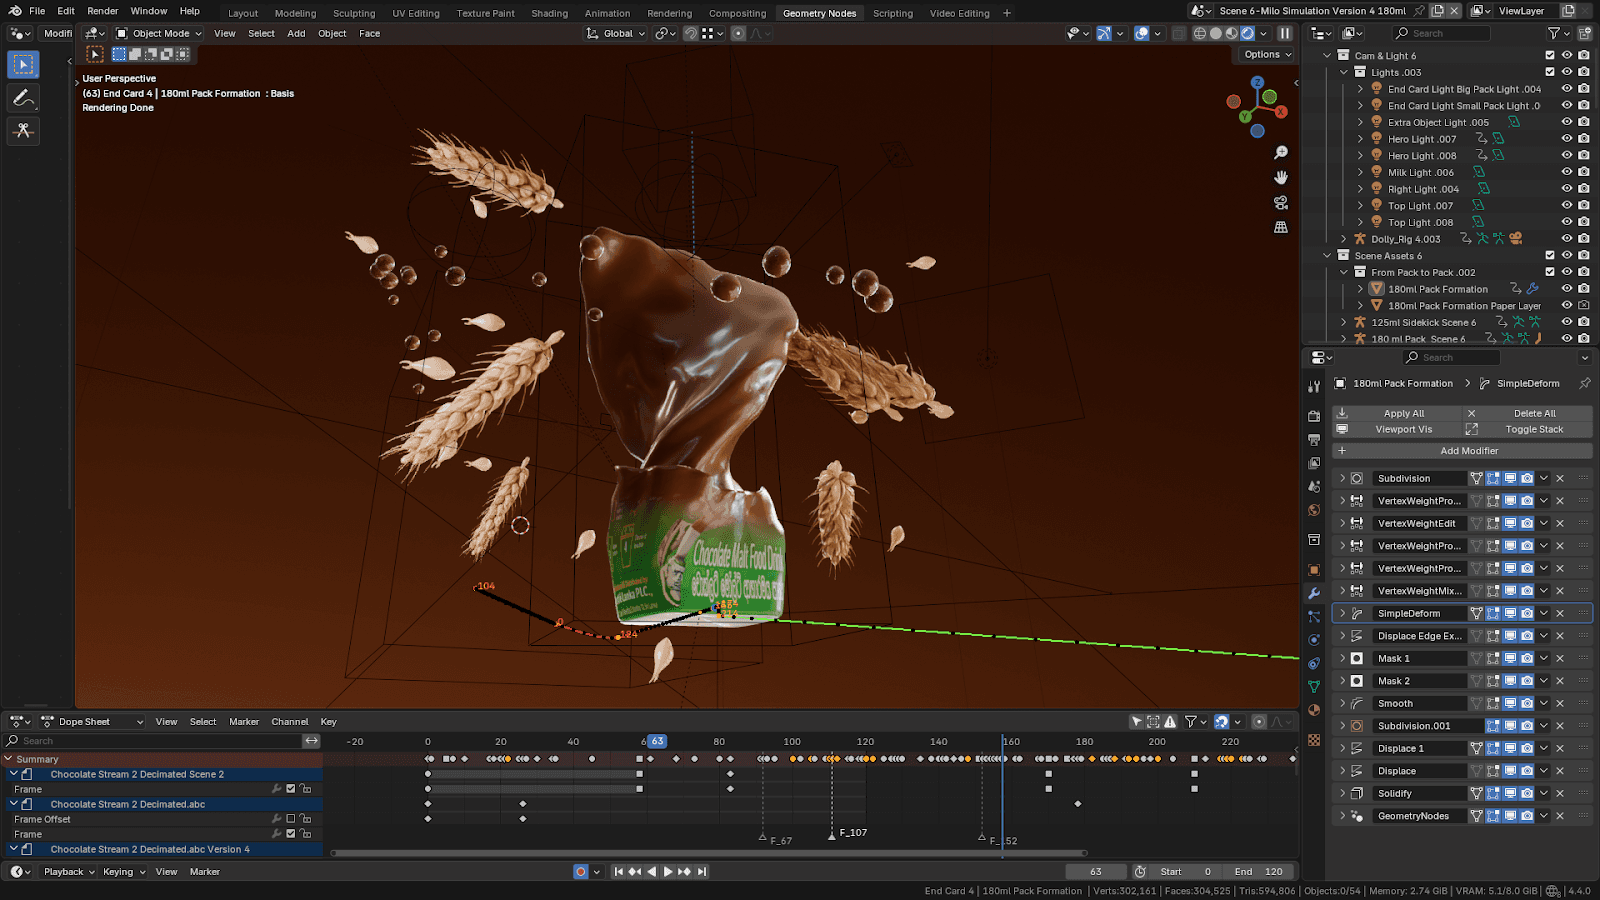
As for the formation of the Milo package, geometry nodes came in handy again to create a quick morph animation of where the liquid forms into the pack. I could get into the nitty gritties and tell you how I used ico-spheres as proximity meshes, but the picture looks much cooler.
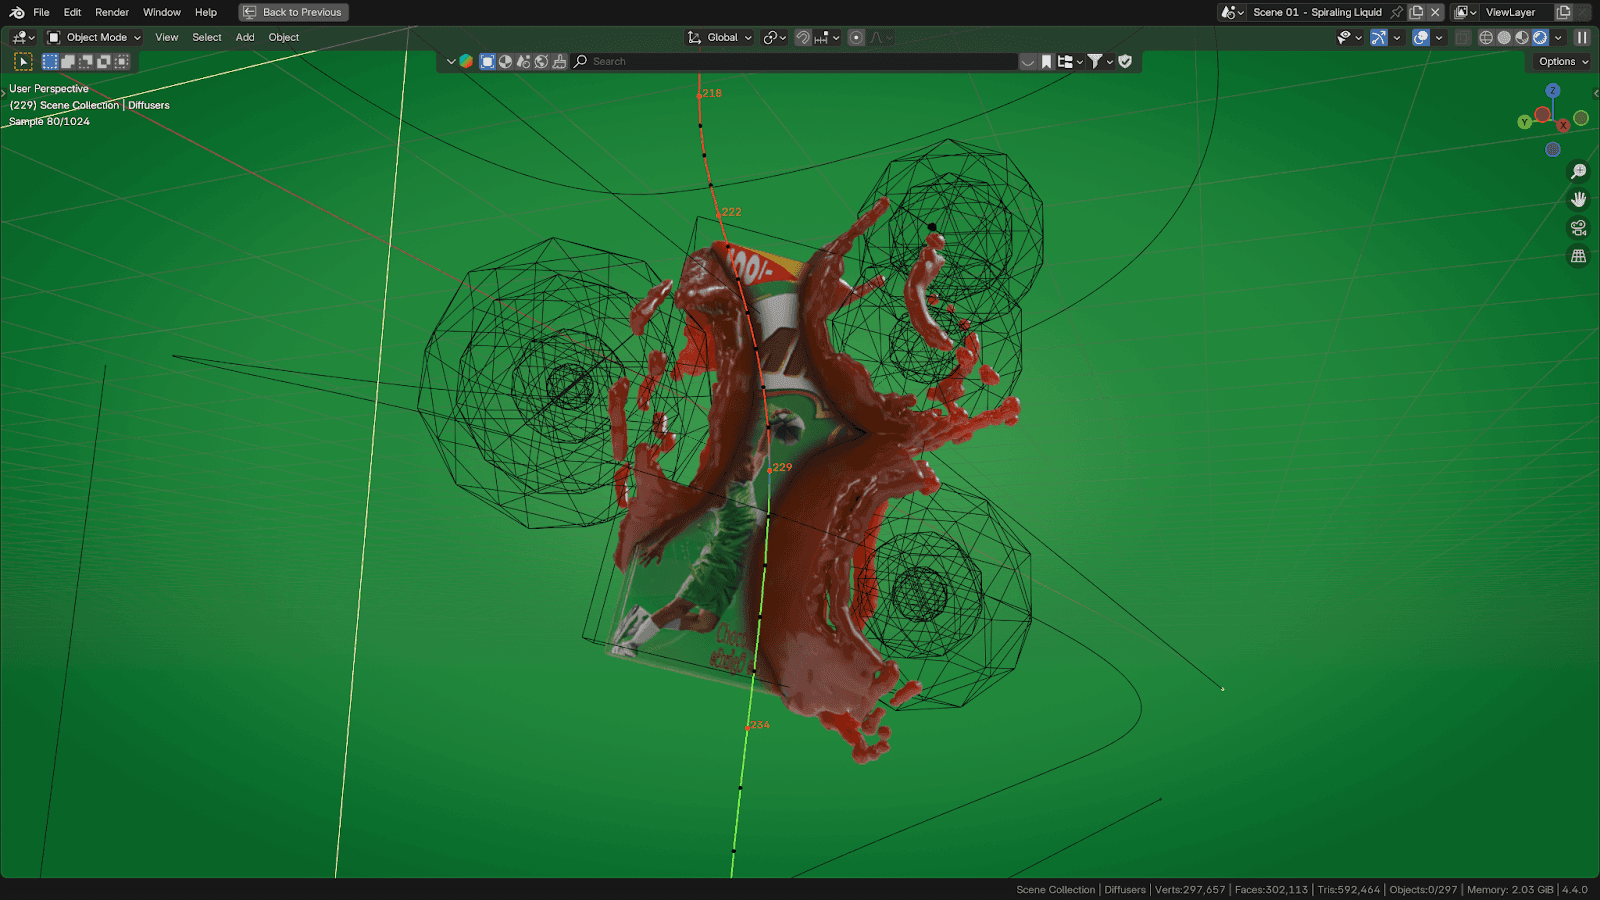
The Initial Formation Effect
Here's a sneak peak into the initial renders!
The Devil in The Details
Now this is where we shove simulations down the water hole because time is fickle and in short supply when it comes to a 3D workflow. It's suffice to say that the first iteration needed a lot of work, the most obvious being the appearance of the liquid itself.
he simplest solution to this was using sculpted liquid mesh assets. Along with these meshes and using something we call 'Armatures' that consist of 'bones', I animated the sculpts to the clients liking. Safe to say it was quite smooth.
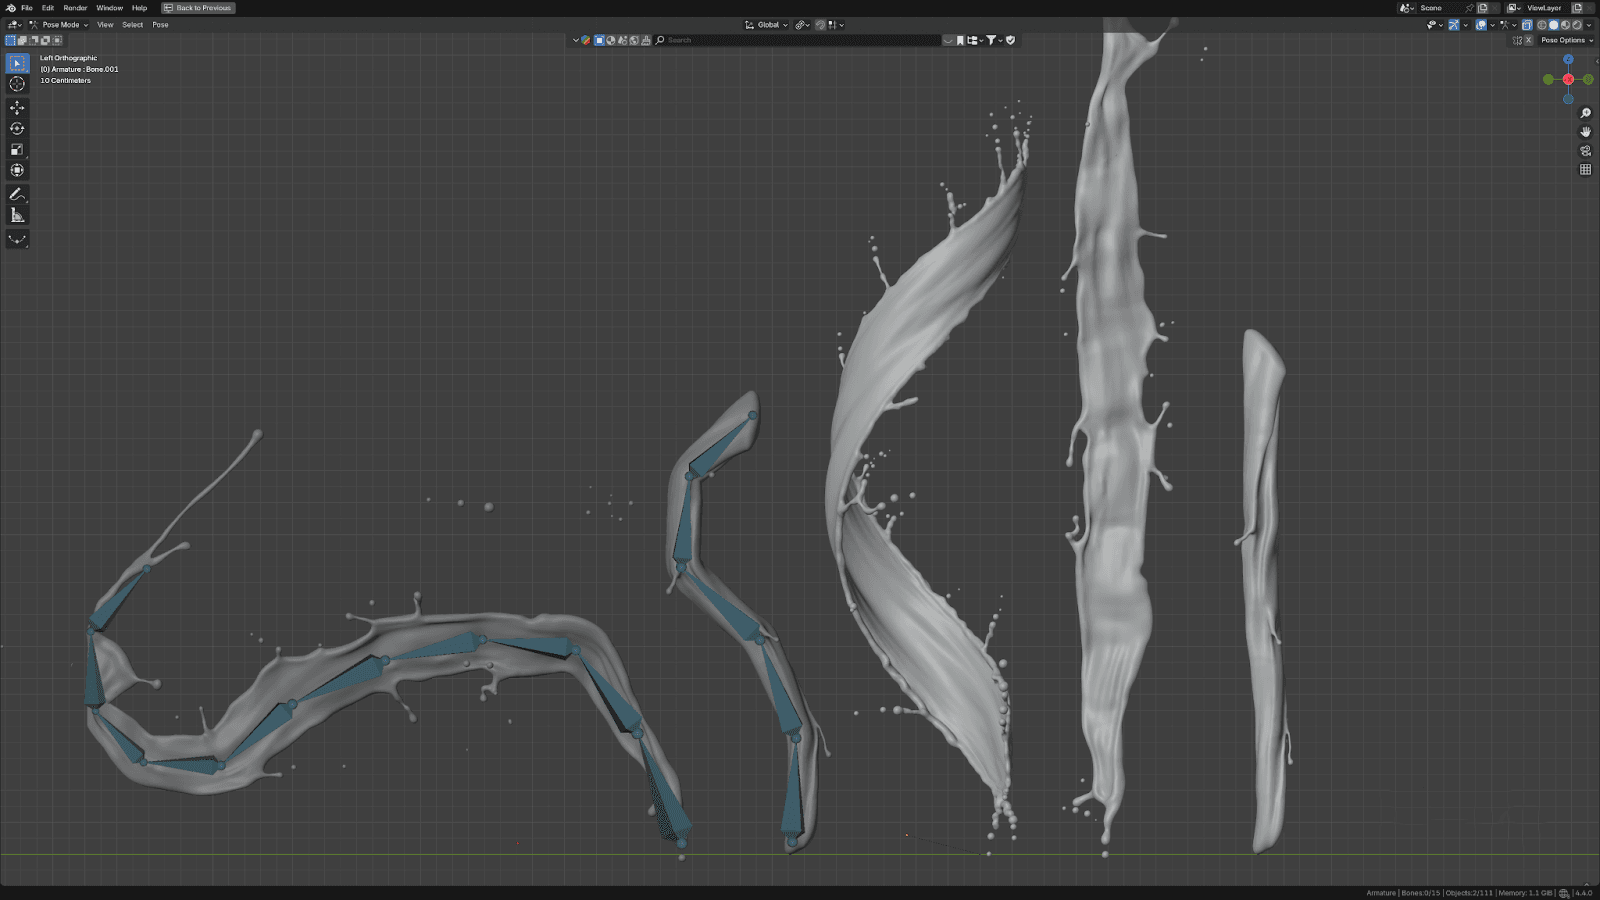
Straightening Liquid Meshes Using Armatures
The second rendition was an improvement, but there was still things missing. The truth is, it can be quite difficult to visualise exactly how it's going to look until it renders. Hence, it takes time. The liquid and the streams were quite lax in terms of screen presence. With a little revamp here and there, thus came, the third rendition..
LiquiGen: The (Wet) Journey
Do you ever just stare at the mixture of milk or cream when you make your tea or coffee? It's mesmerising isn't it?
I wish it were that simple to simulate
As per the clients requirement, they wanted to see the liquid mixing with each other as it came together to form Milo. To do this, LiquiGen was the most promising software to use. As powerful and intuitive it was to use, it was a painstaking process of moving around the liquids in a way that helped come together without affecting the simulation greatly.

The LiquiGen Simulation Viewport
The workflow went like this. Create the simulation in LiquiGen, export the simulation to Blender, create proxy meshes, tweak, tweak, tweak, and leave it until the final mesh can be swapped to render. This was done because the actual mesh resulted in large file sizes, totalling about 35 gigabytes in size (and you can imagine how big it got with changes post renders). Hence, I used something called a decimate modifier to create proxy meshes to work with a little smoother. It's pretty much like when video editors use lower resolution footage to work faster and then link the higher resolution ones when rendering.
The Decimated Liquid Meshes
One door closed, another one opens. This was in fact a small door that I had to go through. The simulations were rendered at a 120FPS to accommodate the slow-motion effect versus the scene frame rate, which was at our standard of 24FPS. This disparity would cause Blender to disregard the frames that went past 48 frames which equates to two seconds at 120FPS. To resolve this, all the simulations had to be sequenced and animated manually, which meant I had to tell Blender where to put which key frame at which point in time.
Mixology: A Façade
The three different liquids mixing was impossible to simulate through LiquiGen. Only an advanced simulation software such as Houdini, would be able to pull it off, but given the time frame we had, re-simulating everything I had worked on so far was out of the question.
However, thanks to Blender' wonderful flexibility, I had a workaround. I separated the view of the camera into 3 separate masks, with a little addition of noise to make it more seamless. So when any of the three liquids came together, it would like it's mixing, but really, its just the merging of masks.
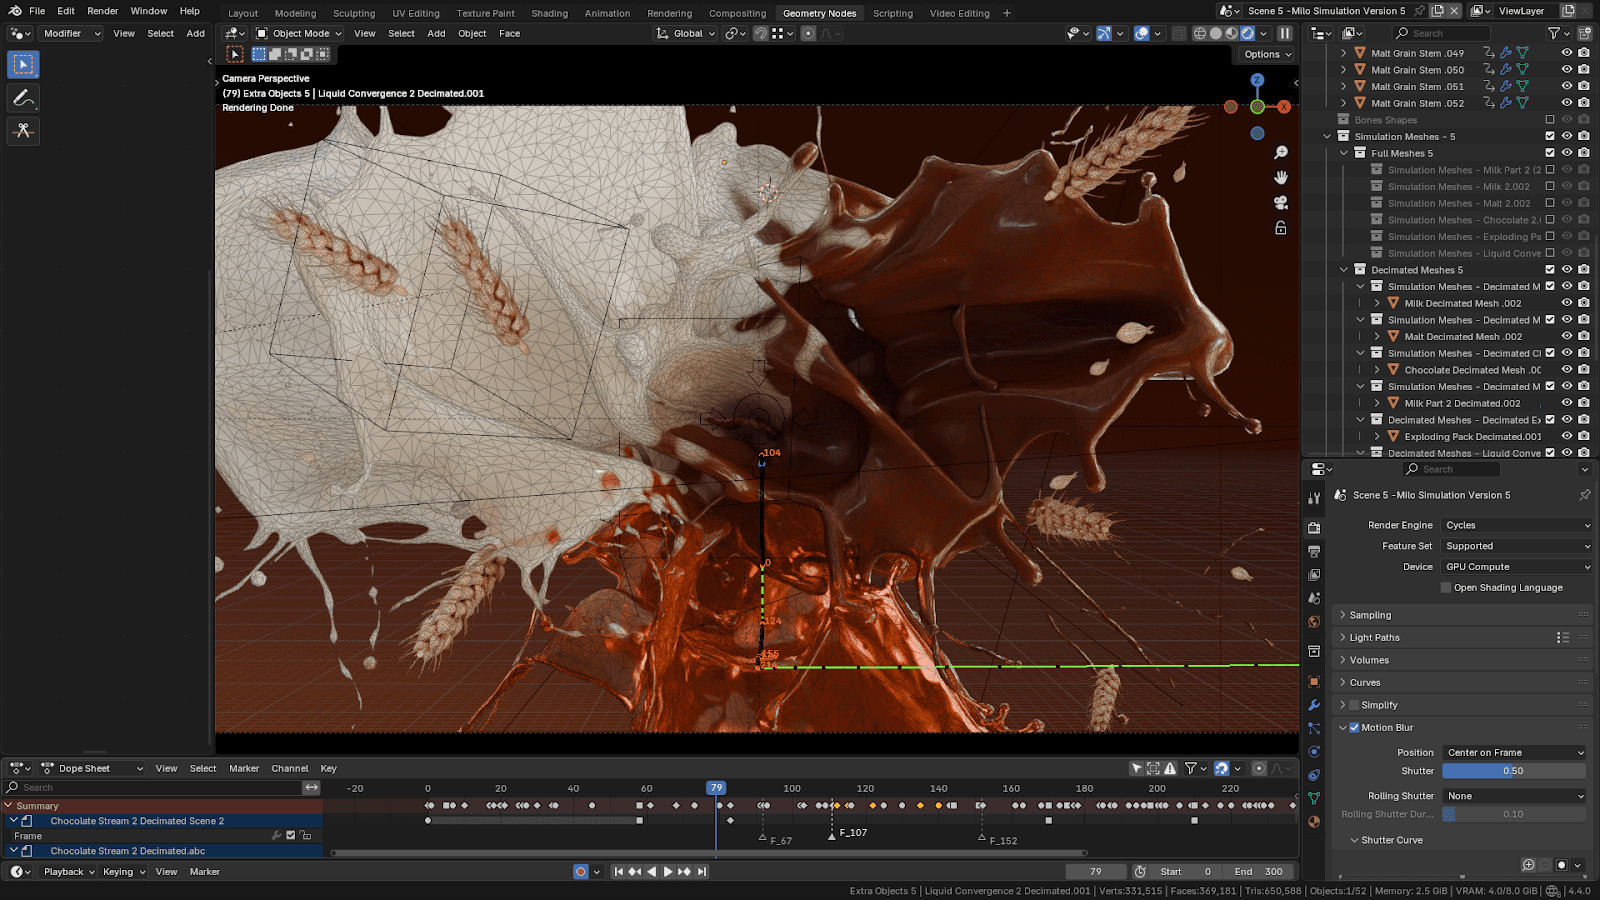
Liquid Convergence
Once the three liquid splashes were established, the next challenge was to have them come together to form the Milo packaging. The trickery arises. At the frame where the fluids were to form, a 3D 'snapshot' of the mesh was taken back into LiquiGen and re-simulated to combine and transform into this new mesh.The pack formation effect also had to be revamped with the packaging forming around a gooey Milo centre. This effect was done using a mix of masks and modifiers that if i went into detail to tell you about, you would lose your mind (quite like I almost did!). Keeping this part of the workflow non-destructive meant I could apply the same thing to Milo's standard pack.
After 20ish iterations and a 100+ hours of work, the final render was complete. My final takeaway from this resulted in learning an entirely new software from the ground up, learning the workflow between LiquiGen andBlender. It was an experience much like when birds throw their young off cliffs or trees and hope that they fly. It was either figure this out or a bust, and I feel its safe to say that we figured this out and it came out great for a sequence of this magnitude.
For now, onto the next sequence ;) Stay tuned!