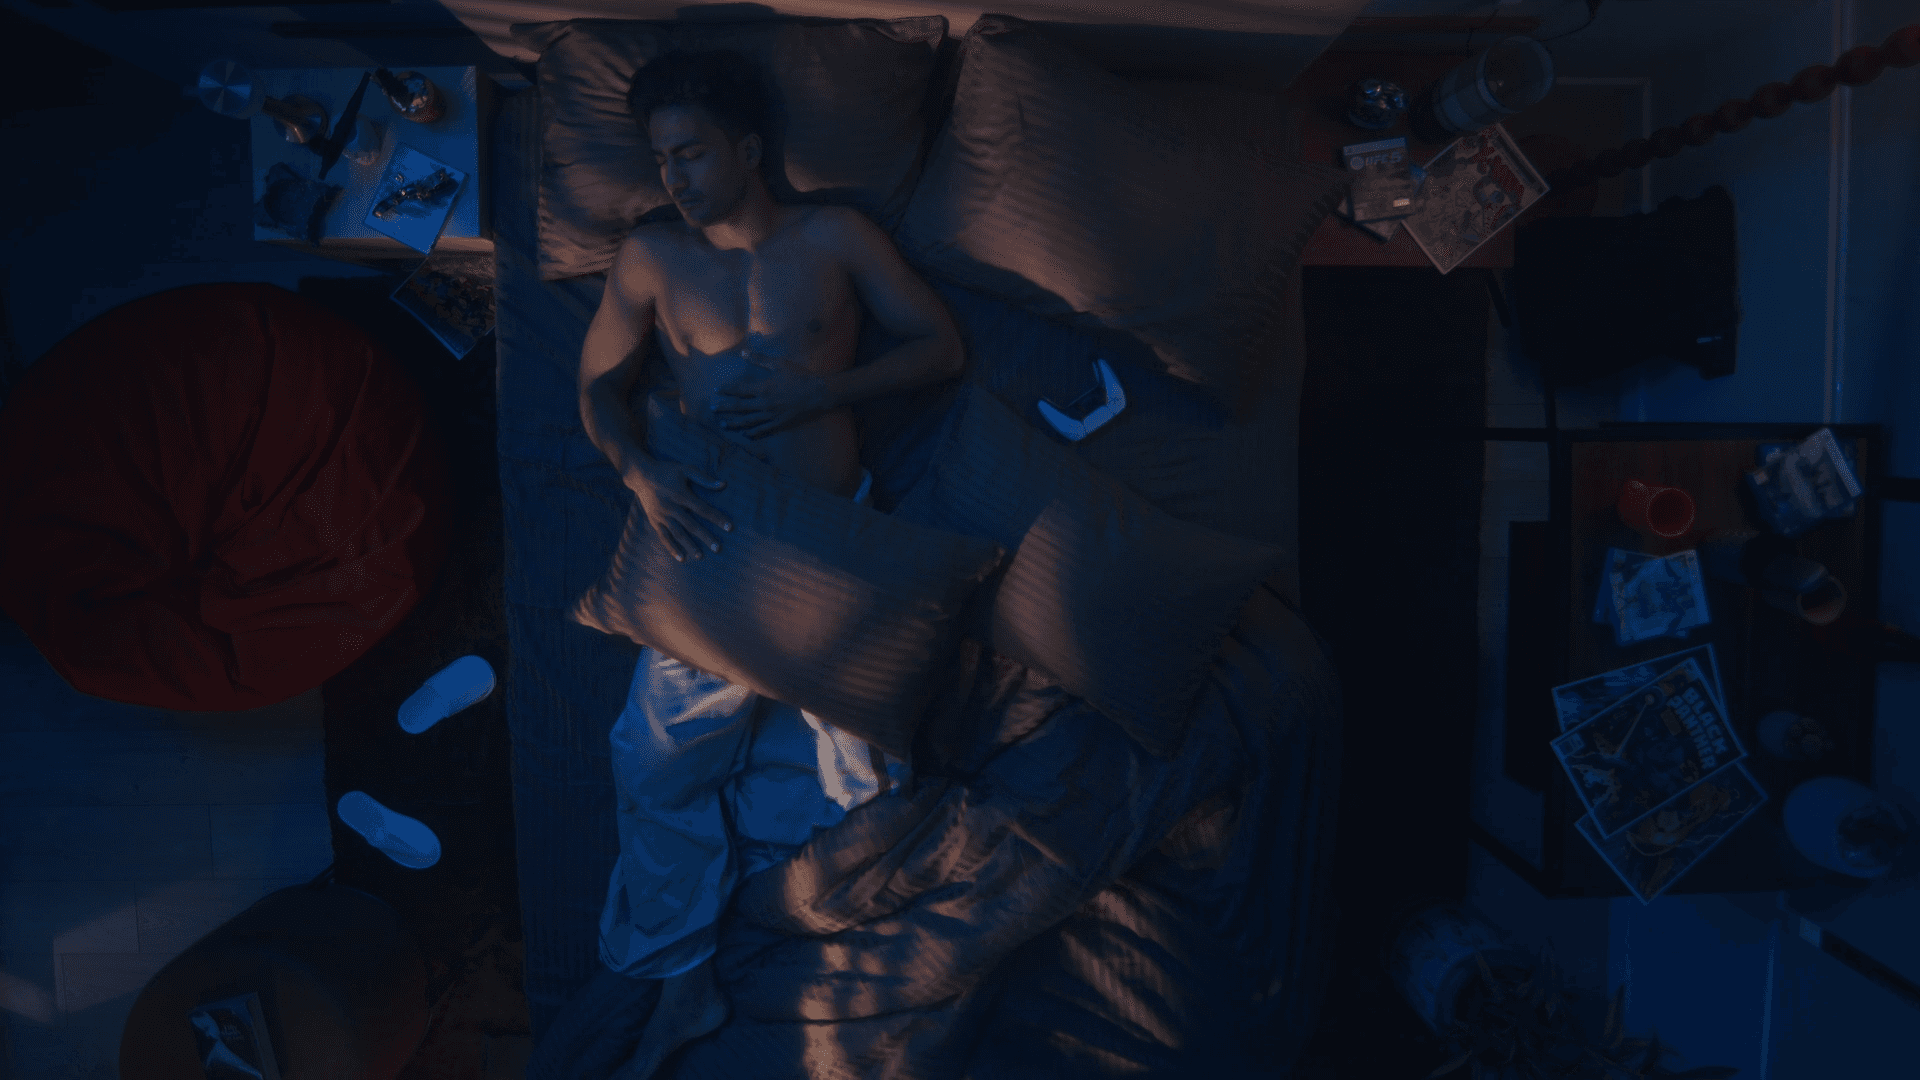
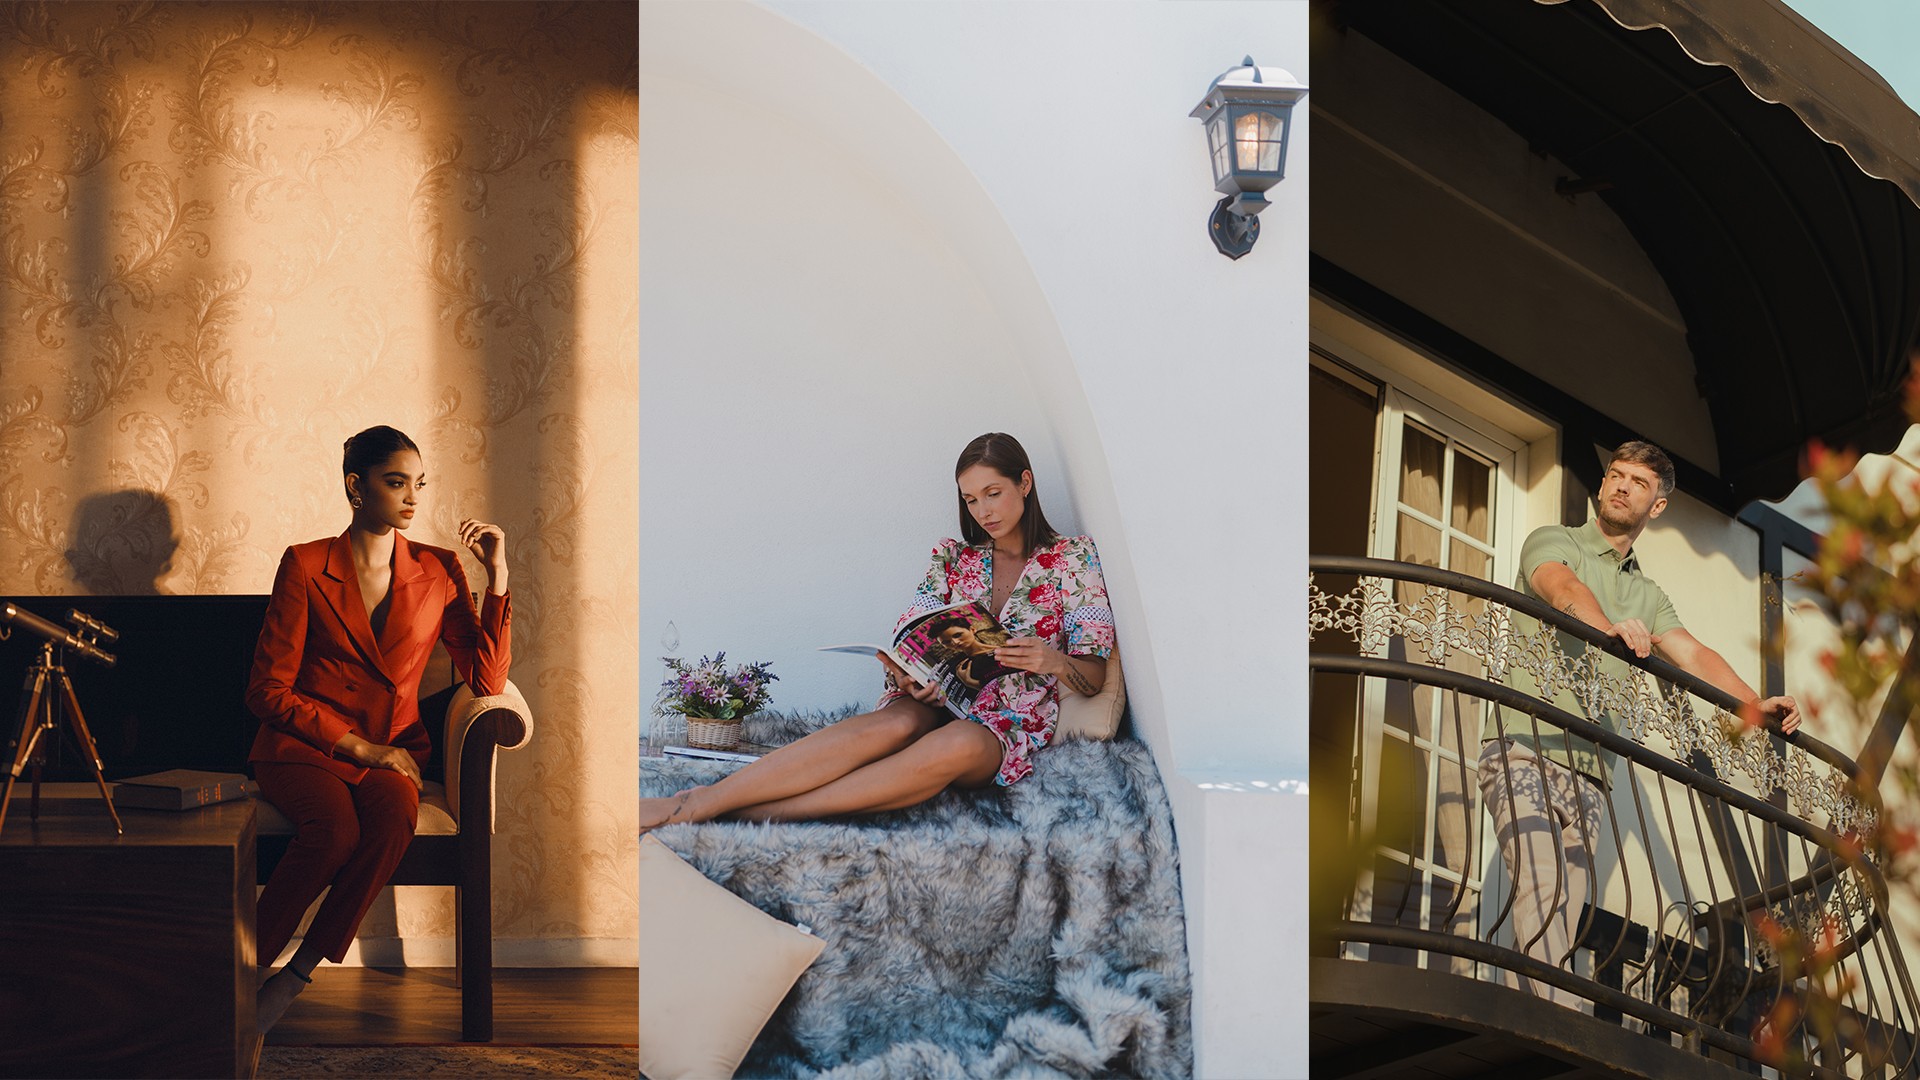
How to Light up a night Sequence - Cinematographic Breakdown
[BY]
Suhaila Shaheen
[Category]
Tips & Tricks
[DATE]
Nov 7, 2024
When it comes to visual aesthetics, "Celcius Sleep Sutra" is hands down one of our proudest projects. The entire project revolved around producing carefully crafted bedroom setups; each having their own character and personality throughout different times of the day. Our goal was to create an intentional gritty lighting style, where every frame is purposefully lit to create those deep, cinematic tones; pairing it with complementary and analogous colours to achieve a more seamless and cohesive look throughout. We’ve put together a little breakdown of how we translated our idea from pre-production into screen. Before we begin - the term “Motivated” will be a recurring concept throughout the guide and it’s vital to understand what it truly means. What is Motivated Lighting? Motivated lighting is a technique where every light source illuminating a scene, subject, or object has a clear and justifiable origin. This is typically achieved by providing a visible context within the frame—such as a window or a lamp—helping the lighting feel natural and grounded. Want to see the technique in action? Watch the commercial below :
The Opening Shot
It's no surprise that opening shots establish the tone and mood, setting the stage for what the audience is about to experience—so it was essential for us to get it just right. For the SleepSutra opening, we aimed to evoke a Dune-like vibe that complements the script's golden-hour setting.
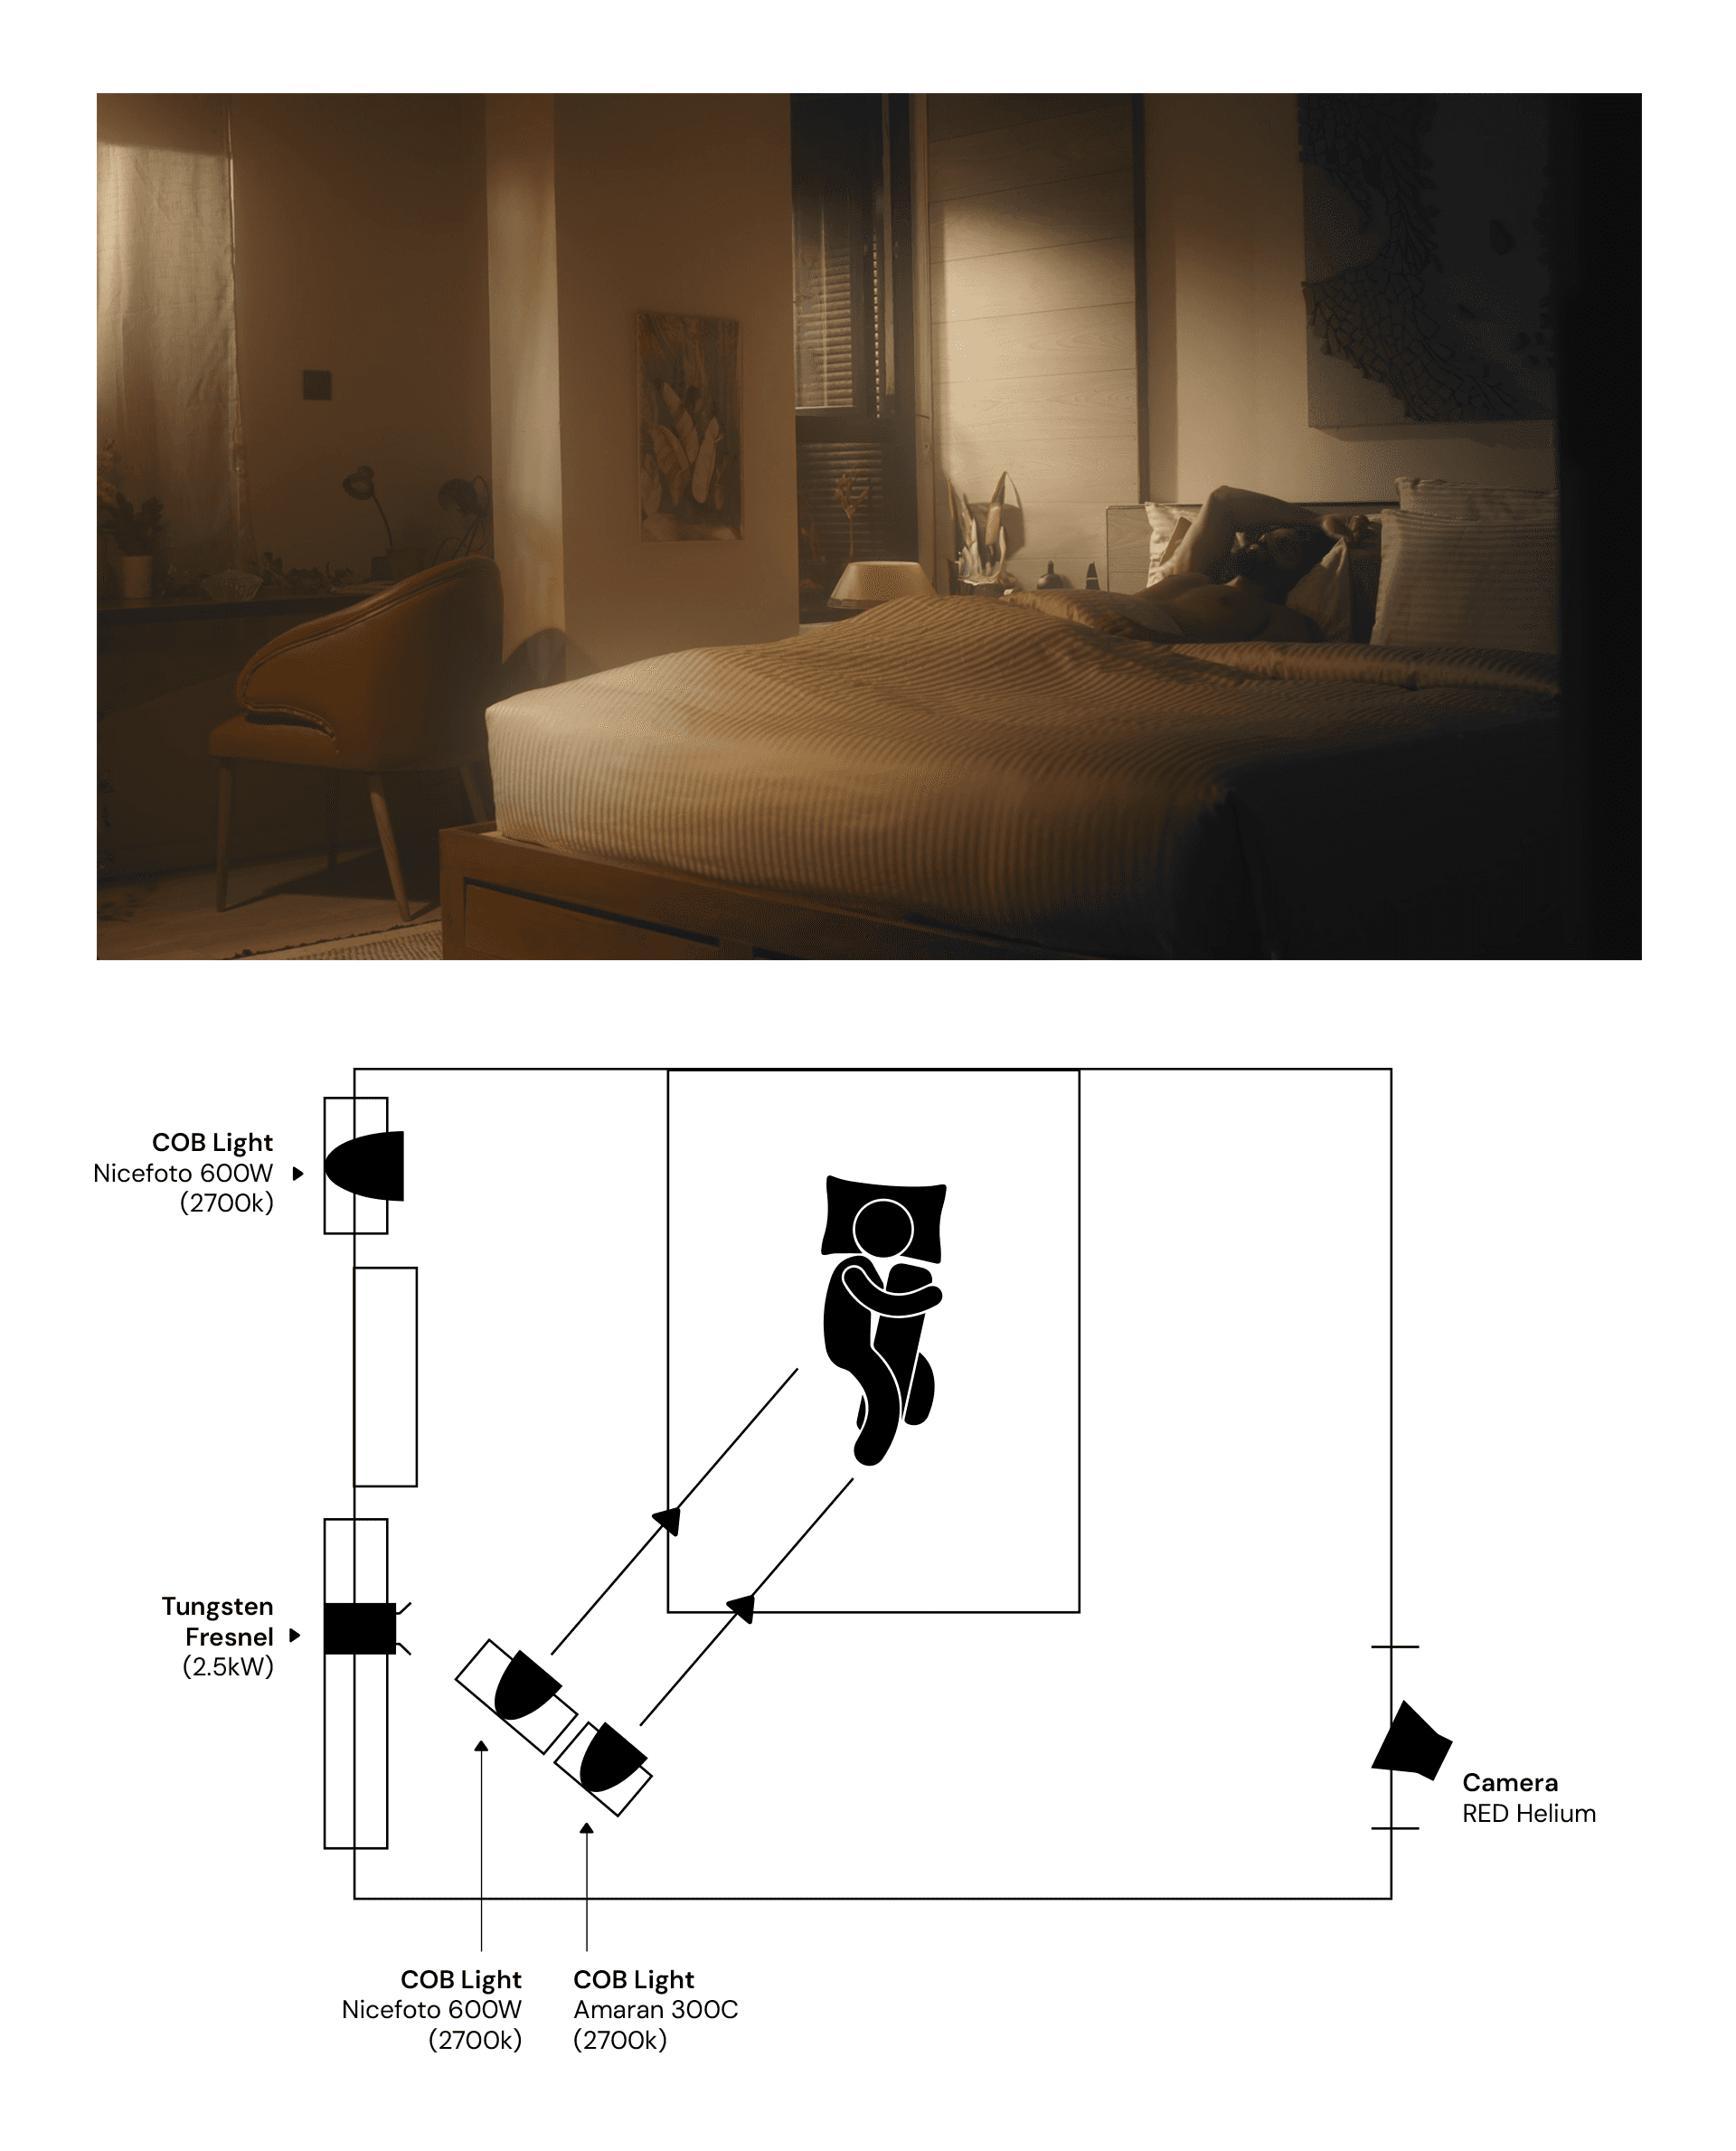
The lighting setup for this scene was intentionally simple—we aimed for a unidirectional configuration, using the windows on the left as the primary source of motivation.
A Nicefoto 600W Bi-Colour COB was placed outside the furthest window to create a subtle slash on the wall, adding depth to the scene.
The 2.5KW Tungsten Fresnel provided a warm ambient glow, serving as our key light.
Two additional COB lights (600W and 300C) acted as accent lights, casting a gentle hotspot on the bed and our subject to enhance depth.
In this case, we didn’t need a fill light or bounce card on the right side, as the white-painted wall naturally bounced light onto the subject's shadowed side.
All lights were set to 2700K, while the camera’s white balance was around 4000K. This helped achieve a balanced colour contrast, introducing varied warmth levels across the shot. None of the lights were diffused, preserving strong shadows and contrast that added tonal depth to the scene.
Ralahami
This shot was by far the most time-intensive to light (given our limited set space), yet it yielded the most rewarding outcome and became our favourite. For this scene, we wanted to bring out a setting that felt like it was 5 AM so we needed to have a bit of the blue hour light to create the overall ambience coupled with a window frame GOBO in orange, to complement and add colour contrast.
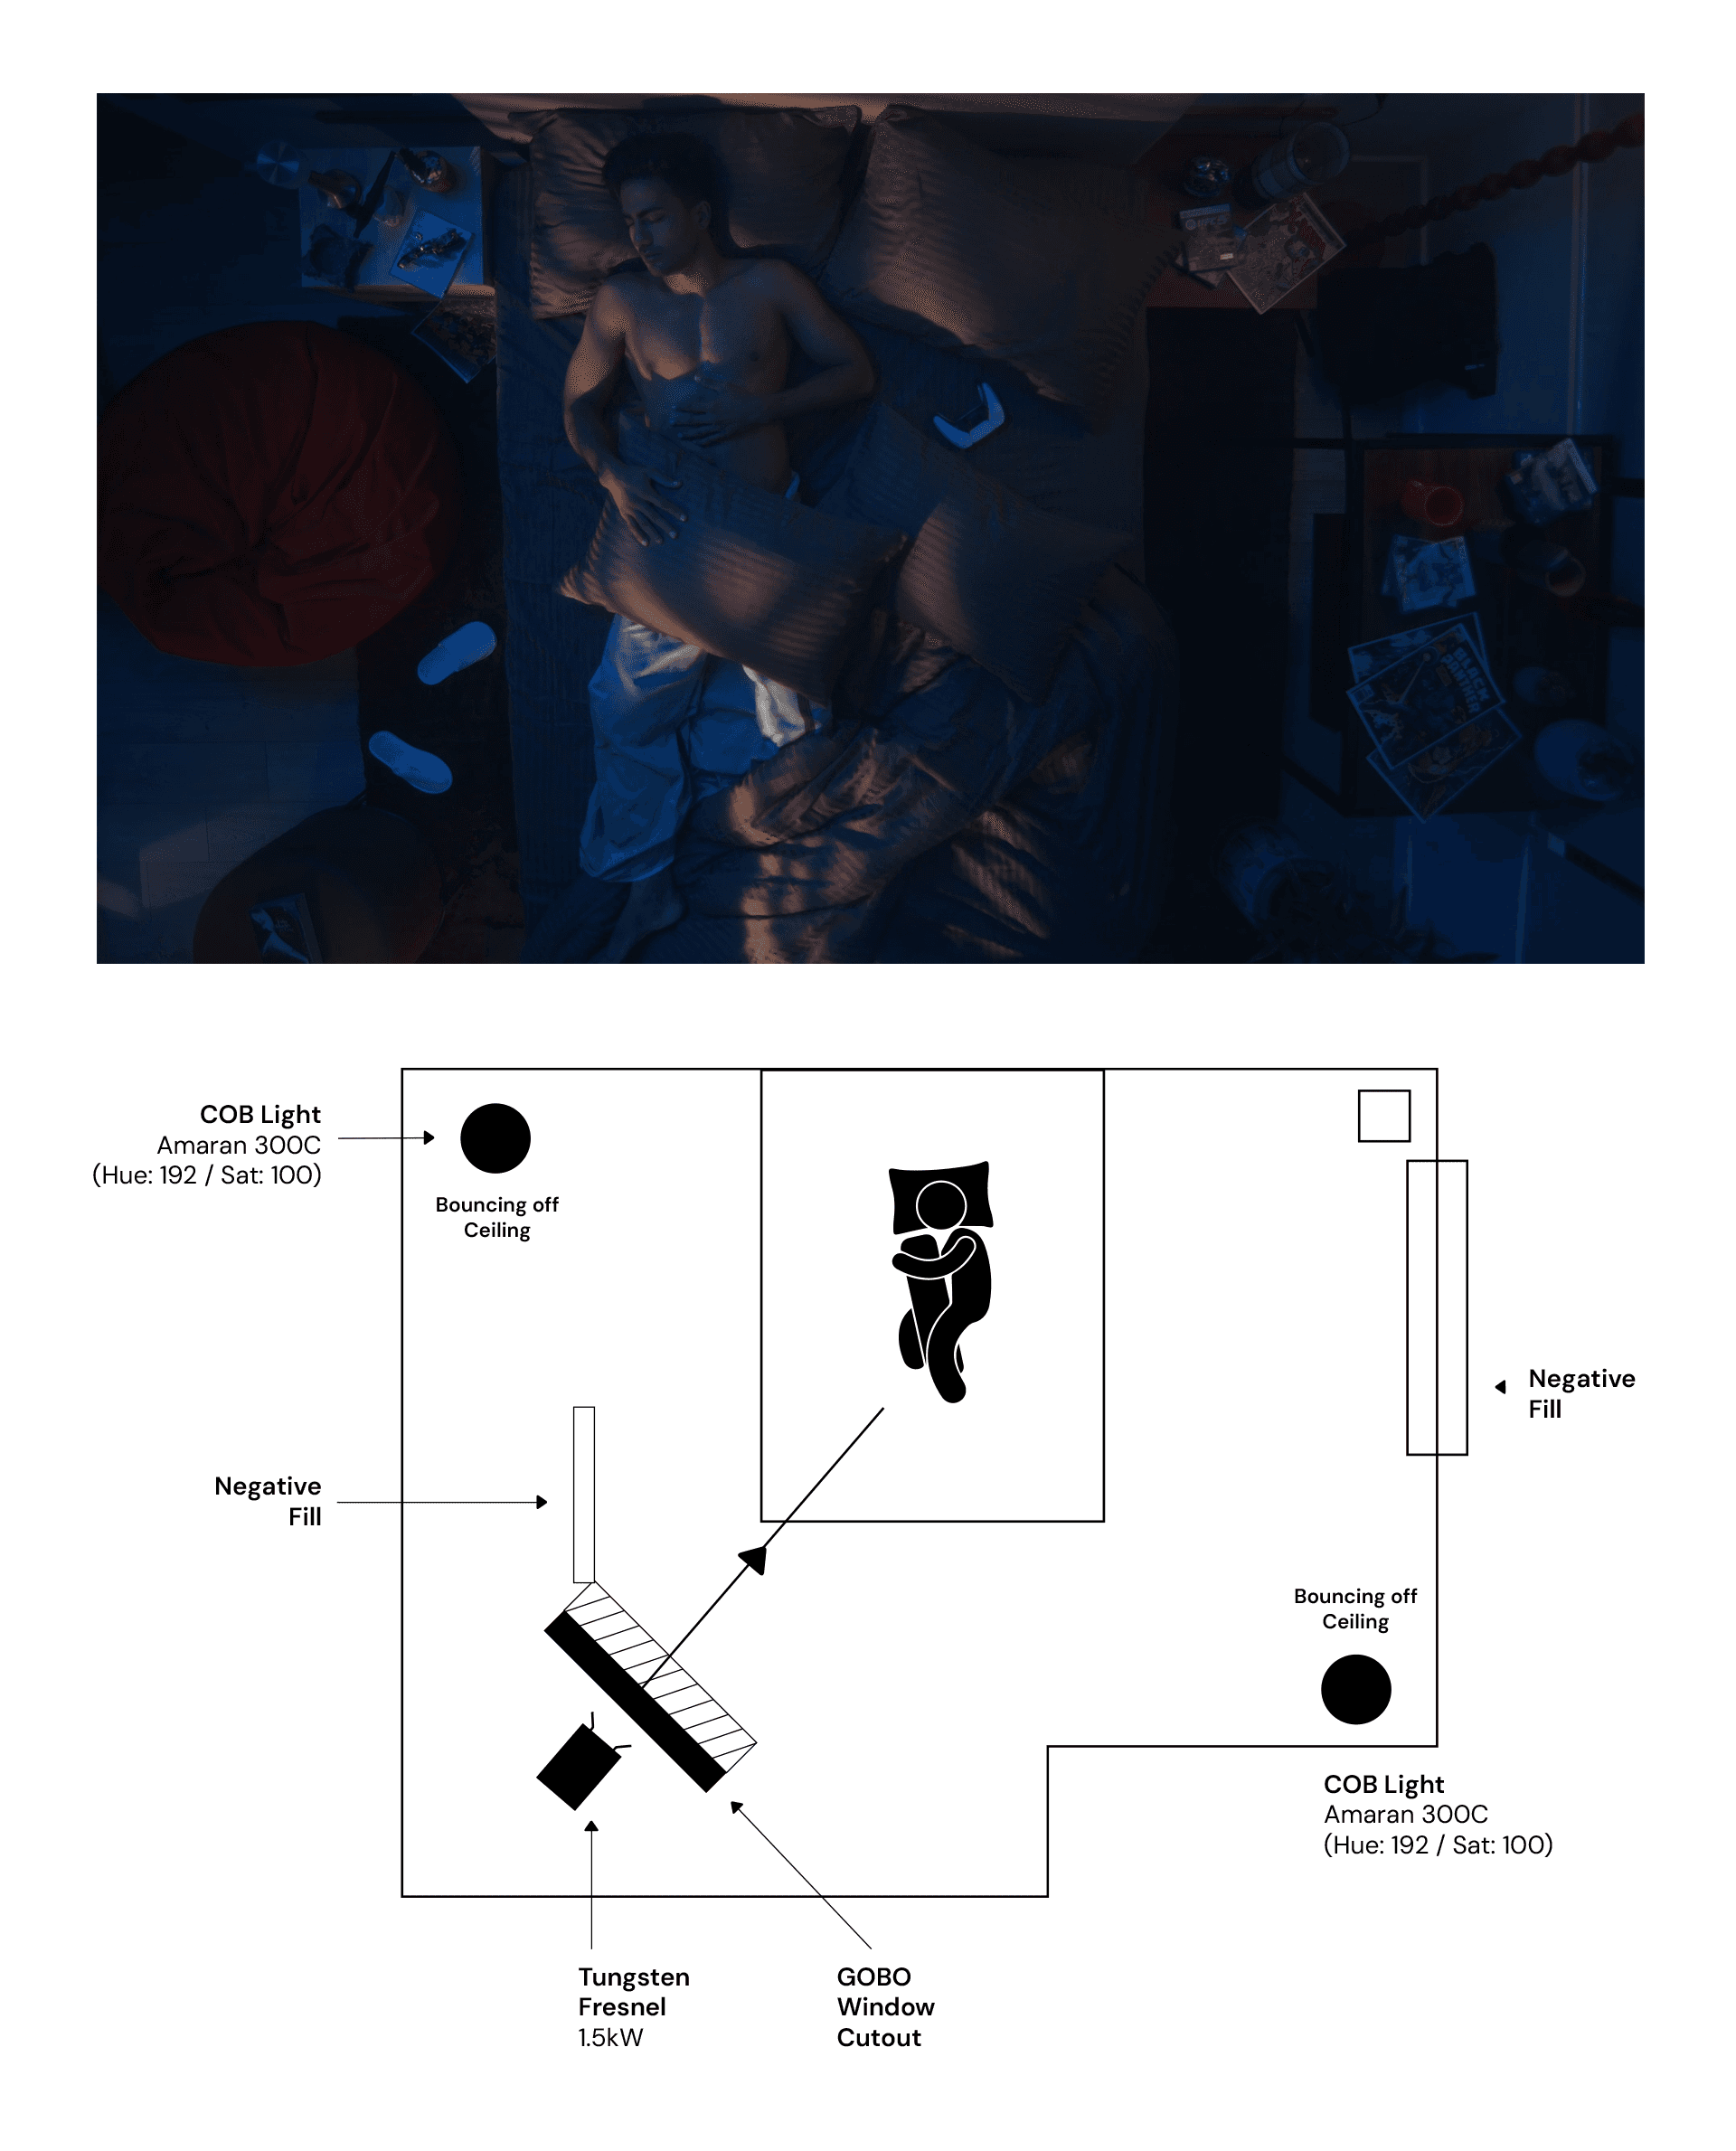
The two main key lights in the scene were Amaran 300C units set to RGB mode with a cyan/blue hue of 192, at full saturation and brightness. Positioned at diagonal ends of the room and angled upwards toward the ceiling, they created an even, balanced blue ambience that filled the entire space. This was our first step in establishing the base look.
Our primary accent and highlight came from a window cutout we crafted using strips of wood, placed in front of a 2.5KW Tungsten Fresnel. This added colour contrast and depth to the scene, but configuring the ideal distance between the light and the subject, as well as the orientation and spacing of the strips, took the longest time. To avoid spill on the walls or outside the bed which could be distracting, we placed a negative fill on the left side.
A negative fill on the right-side wall further deepened the shadows on that side of the frame, enhancing the dramatic effect.
Additionally, it's crucial to set a white balance on the camera, as this serves as a reference point for adjusting the other lights. The difference in white balance between the camera, lights, and any practical light sources helps create desirable depth in the scene.
Rajapasse
For this scene, our goal was to convey the feeling of a late morning, with the sun high in the sky, casting harsh light rather than soft; creating an outside daylight white balance of 5600K. Since the scene begins with a profile slider shot, it was crucial to highlight our subject’s buttocks as the sequence revolves around it. From the production stage, we aimed to present this moment in a heavenly way, using strategic light placement to create specular highlights along the edges.
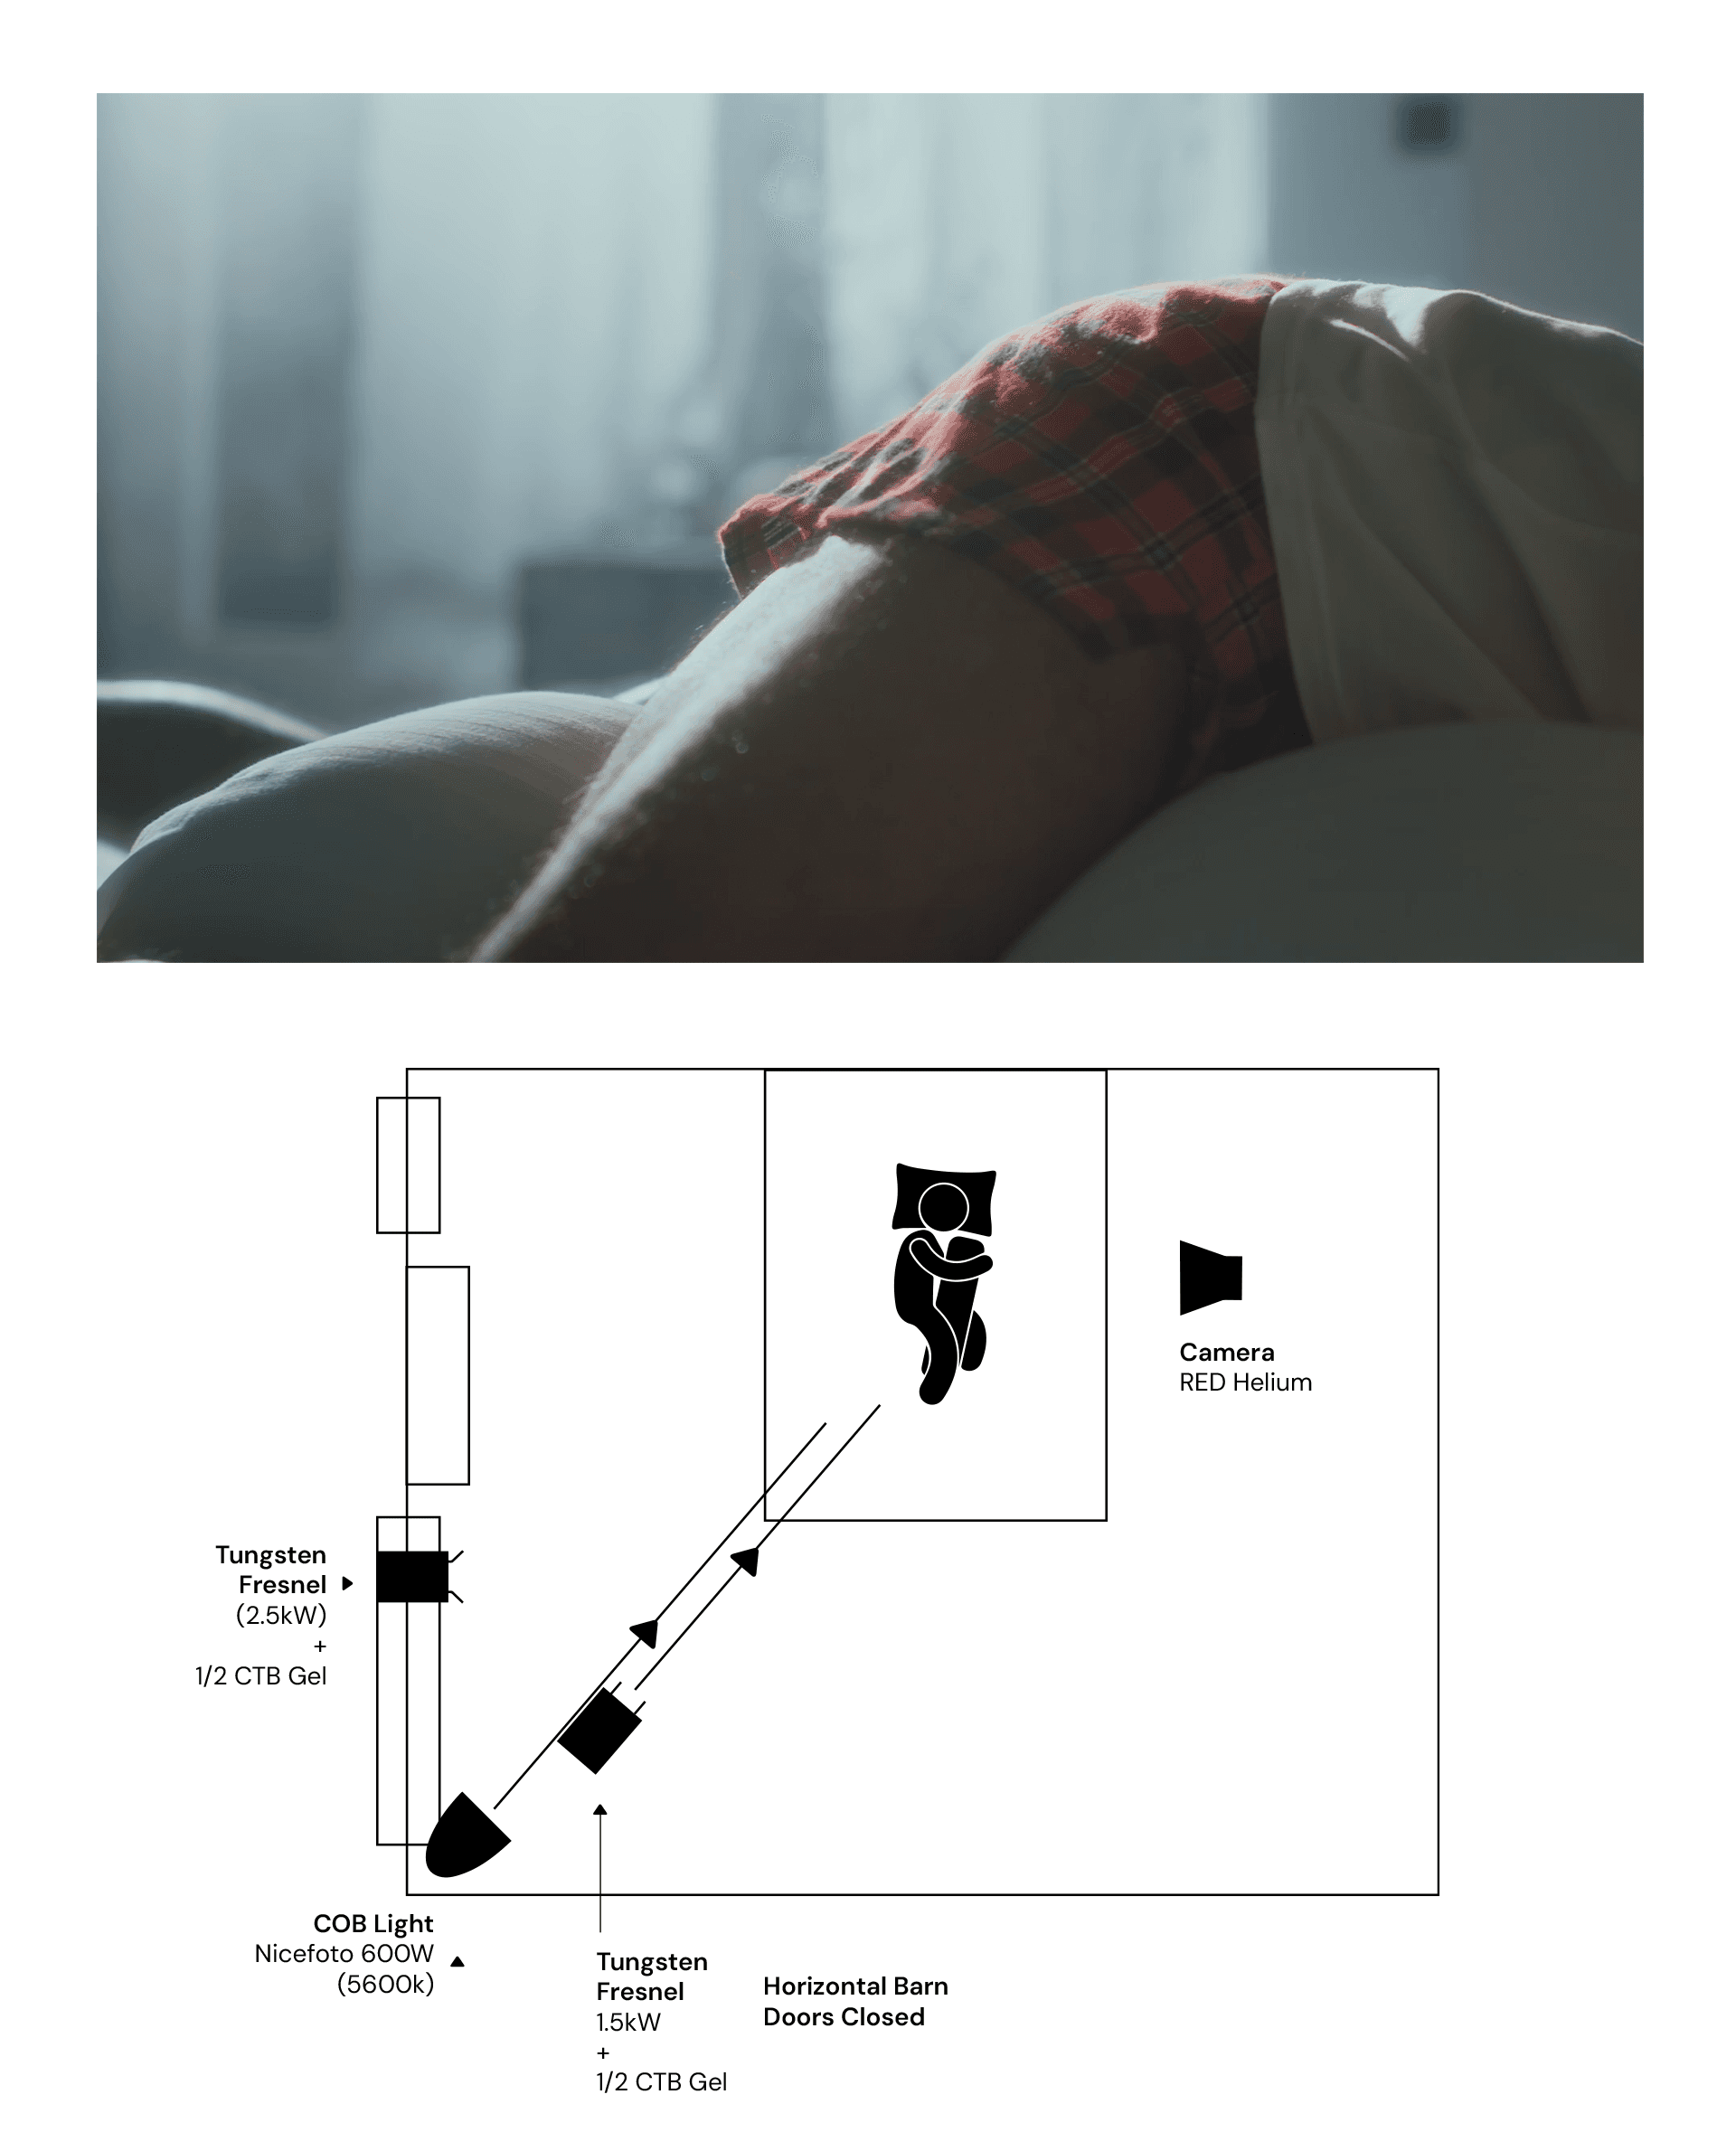
The setup is similar to the opening shot, but this time, all the light fixtures are set to daylight (5600K). The shot also follows the classic "lighting from the smart side" technique, which involves illuminating the part of the subject that faces away from the camera.
The first 2.5KW Tungsten Fresnel was positioned outside the window, acting as a backlight, with the window serving as the motivation for the light source. Note: This shot was taken at 10 PM, so there was no ambient light, which worked in our favour as it allowed us to carefully control the colour temperature of our fixtures without much fluctuation. The curtains acted as a diffuser to soften the light.
The Nicefoto 600W COB, set to 5600K, served as the key light, adequately lighting our subject. Once again, we opted for no diffusion to preserve the harsh highlights and shadows, which helped maintain the contrast.
The small 1.5KW Tungsten Fresnel was mounted on a C-stand and placed close to the bottom edge of the bed, carefully oriented to create specular highlights on our subject’s thighs and shorts.
For this scene, we set the camera’s white balance to around 4500K to achieve a balanced mix of cyan/blue tinted highlights and warm shadows.
Kimbula Banis
This scene is set around an evening nap with rain falling outside, so the lighting is soft and diffused, as the clouds would naturally mellow out any harsh light.
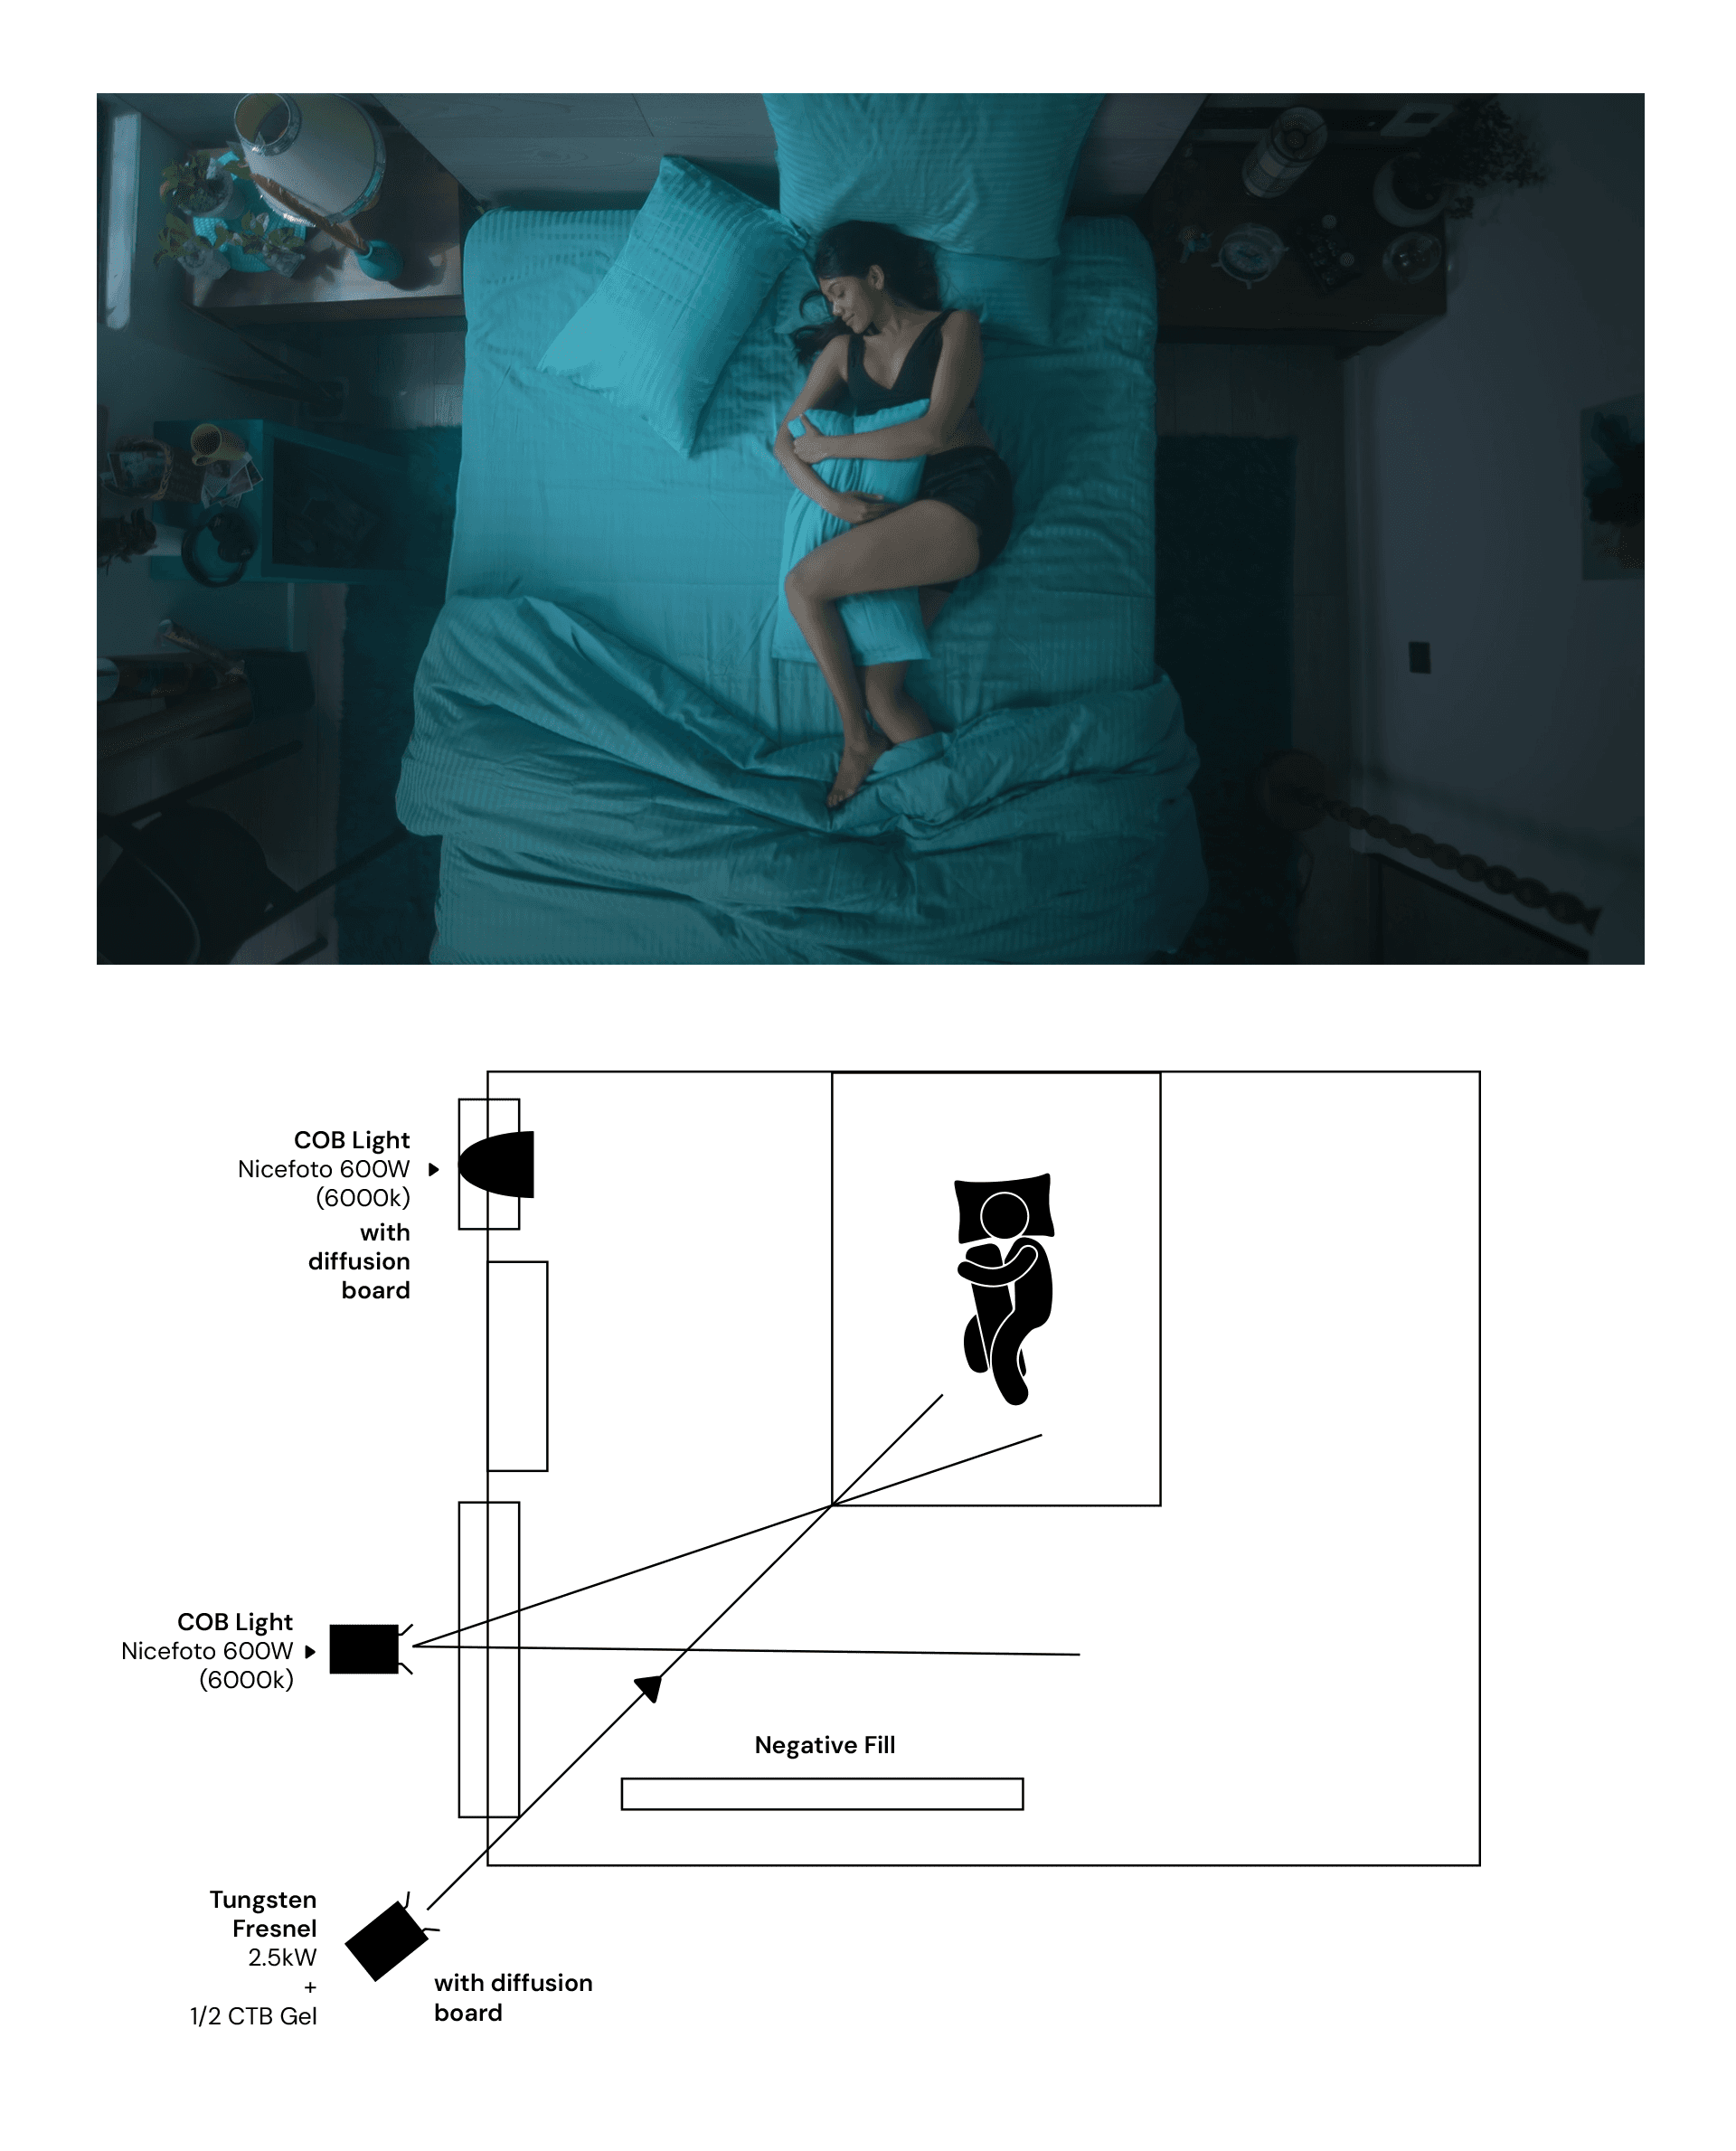
We aimed to create a natural vignette through careful light placement, and in this case, the Nicefoto 600W was positioned outside the first window, using a strong diffusion board as our key light.
The second 600W COB was directed at the ceiling to provide overall fill and increase exposure.
The bottom Tungsten Fresnel, with a ½ CTB gel and diffusion board, helped further fill the shadows on the bottom half of the bed as well as our subject’s lower body.
For this setup, all our lights were configured to 6000K to capture the blue tone typical of a cloudy evening, while the camera's white balance was set to 5000K.
